I got waaay behind on my March block for the Sewn Together Bee. The saving grace was that Kristan mentioned that she wasn't in a rush for her blocks. Still I am sorry it took me so long to get the block back to her.

This block was really out of my comfort zone. It challenged me and really stretched my skills. The great thing about this block was I got to try a technique that I had never tried before - curves seams.
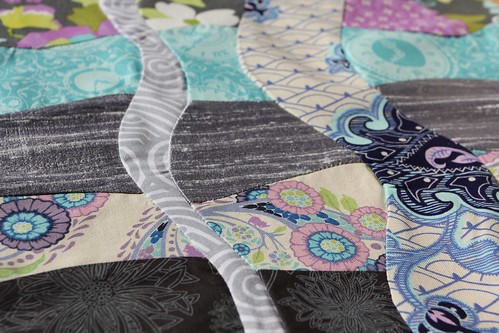
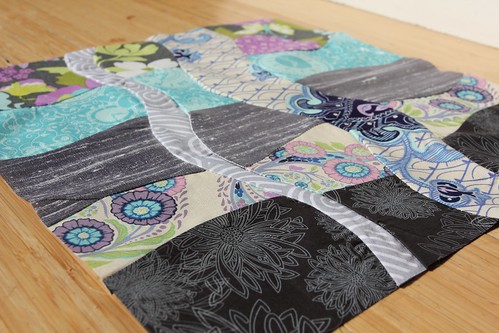
Kristan started by giving us some amazing fabrics to play with and a link to a video tutorial on the curved seams technique. I really loved the silver raw silk she threw in the mix and I started with that as my center. It reminded me of water so I thought of it as a river with the cotton prints acting as the banks radiating out. I would have stopped there but I then decided to add two "bridges" running perpendicular through the block. I don't know that I ever would have tried this technique if not for this block and I am so glad I did!
TIPS FOR CURVED SEAMS:
1) When you're sewing the seams together it all feels a little counterintuitive but in the end it works. Going slowly helps.
2) It helped me to consider the seam as I would any 1/4" straight seam. Keeping everything lined up that way, stopping often and traveling slowly worked (rather than trying to follow the curve).
3) And I cannot stress enough the importance of a steaming hot iron! The iron was my friend on this one. Follow the directions in the tutorial and press the seams to one side. This works wonders on the curved seams.
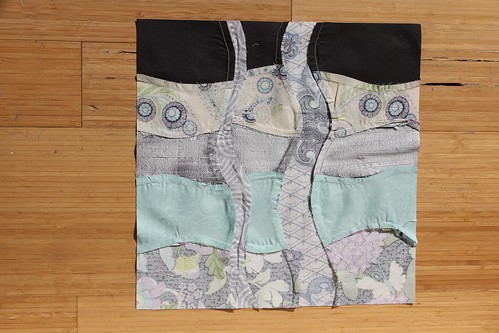
4) After you've pressed the seams to one side flip the block over and iron the hell out of the front side of the block. I noticed tiny little folds or puckers occasionally when I would flip a seam (they usually popped up towards the end of the seams) BUT I was able to iron most of them out successfully.
5) Lastly, I found that I would end up with an excess of one strip of fabric toward the end of each seam so this technique does create some waste and don't expect two strips of the same length to end up that way. Take this into consideration when determining your block size. Go overboard and cut the block down or you may end up with a block that is smaller then you anticipated.
If any of you are inspired to try out this technique I would love to see your results. Let me know!
Have you ever tried the curve master foot? I recently bought one in March and I love it for curved seams. Love the block!
ReplyDeleteWow. Your post today is serendipitous as I just finished designing a quilt for my cousin's wedding that is full of curvy lines and I had no idea how to approach them! Thanks for including the video tutorial link!!
ReplyDeleteAnd your block is GORGEOUS!!
It's gorgeous! I'll keep your tips in mind if I ever get up the courage to try curved seams.
ReplyDeleteoh, cool block! that looks like fun. and a little scary. ;)
ReplyDeleteThat is very, very cool! Nice job!
ReplyDeleteOh that looks great...I love curves!!!
ReplyDeleteI, too, used to be afraid of curved seams. Once I jumped in, though, I found them to be much easier than I expected. Your block is beautiful.
ReplyDeleteI tried that technique in a class once, it was very liberating. The block looks great and I love the star quilt you've just finished.
ReplyDeleteits beautiful! i'm so impressed!!!
ReplyDelete