Friday, July 29, 2011

Rainbow I Spy Block Drive

Rainbow I Spy button

You all know I run the Hope Circle at do. Good Stitches, right? In September our circle will be starting it's second year. I can hardly believe it. Well, my friend Natalie of Threaded Mess had an inspired idea for the last month of our first year. Usually our circle benefits a charity called Threading Hope but she asked for a grace this month so we could make quilts for a cause near and dear to her heart.

If you don't know Natalie, she's the founder of the NOVA Modern Quilt Guild and quarterly her guild does a premie quilt drive for the NICU at Inova Fairfax Hospital for Children in Northern Virginia. The hospital is constantly running short on preemie quilts so she asked our circle if we wouldn't mind making blocks to help her make some preemie quilts this month. Of course we all said yes. This month, with Anna Maria Horner's blessing, we're each making (at least) two Rainbow Around the Block I Spy Blocks. We're all picking out a color and making two blocks in that shade. I can't wait to venture into my stash and see what I can pull for my blocks.

But it doesn't stop with the Hope Circle - you can help out too! Natalie is organizing a Rainbow I Spy Block Drive. She's asking anyone who's interested in joining in the block drive can send her blocks in one of three rounds - August 30th, September 30th or October 30th. I'm joining in the fun and I hope you do too! Check out all the specifics on Natalie's blog and help keep a preemie warm this winter!

Thursday, July 28, 2011

Little Stitches Week 2 - Pattern K Changing Pad

Welcome Back for Week Two of the Amy Butler "Little Stitches" Sew-Along. Again, this week I made something for Kerry and her "miracle" baby boy due in August.

Pattern K - "Changing Pad" - Difficulty Level: 4

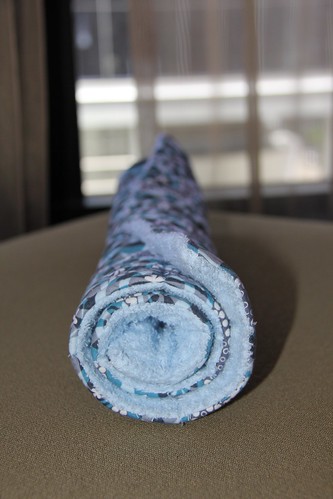
IMG_5726

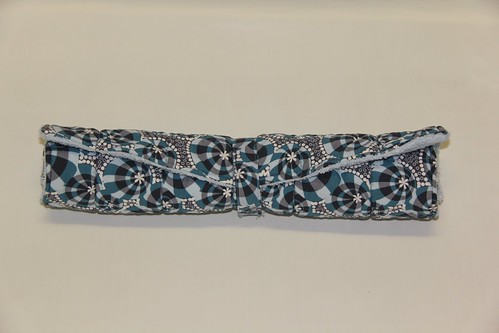
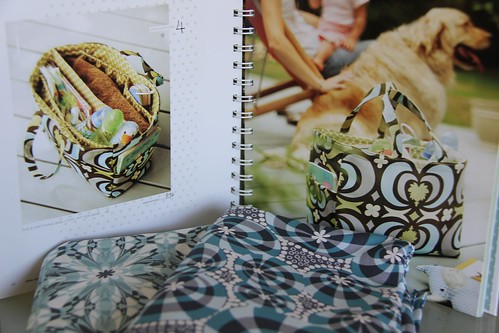
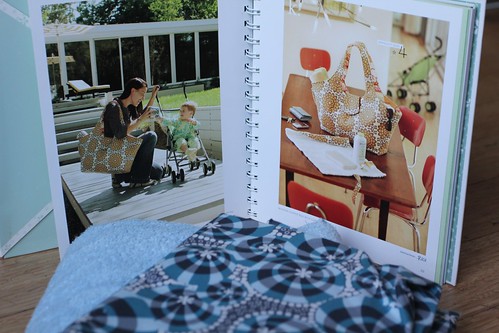
For this one I pulled out my favorite print from AMH's new Loulouthi line. There was some serious swooning going on when I saw this line up close and personal at Sew Modern and the Buoyancy print from the Juliana Palette really knocked my socks off. This pattern also calls for terrycloth so I picked some up in a coordinating blue especially for this project. This was the one that almost didn't make it. I always had the intention of making this changing pad for Kerry to coordinate with the diaper bag I am making her but time started running out and it was almost scrapped. So I have to apologize for the pictures of this project overall.

IMG_5756

This project is fairly straightforward and I honestly made it in one morning as I was about to fly out to Chicago, but since becoming a quilter there were a couple things that would seem completely normal to a sewer but counterintuitive to a quilter. My intention was to follow the pattern as dictated so I did - for the most part anyway. You're working with double batting layers, coupled with your fabrics and any quilter will tell you that batting can be slippery. I mean, one of the first lessons you're taught as a quilter is about basting, right? So this book is written for sewers so the part about basting your quilt sandwich is rightfully omitted. Frankly, it's a small enough project that pin basting with safety pins isn't all that necessary but I did have some sufficient slippage the first time I attempted machine basting my fabric to the batting. It resulted in some stitch ripping and only a moderate amount of cursing (it was early and the hubby was still sleeping). But in all seriousness I found that simply changing the angle of my pins worked wonders.

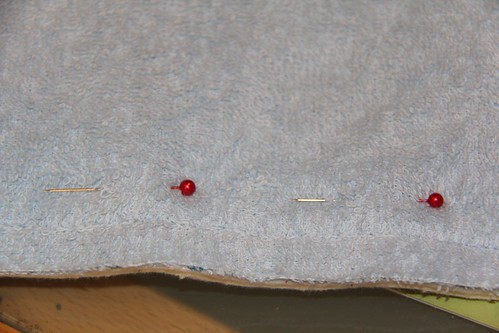
IMG_5740
(This is how I usually pin on a straight edge.)

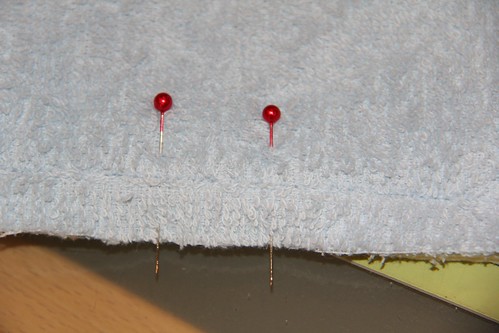
Usually when I'm working with a straight seam I rarely or minimally pin. When I do use straight pins to secure fabric on a straight seam I'm usually lazy and pin horizontal to the edge of the fabric. This is why I was experiencing some slipping when I was basting. The second time around I took care and pinned horizontal to the fabric edge and did a generous amount of pinning. This helped considerably and I didn't have any trouble basting the second time around.

IMG_5739
(Pinning this way works better on this project to prevent slippage.)

Now the pattern doesn't call for the use of a walking foot but here is where I diverged from the plan. I (of course being a quilter) had a walking foot handy so I opted to use it for this project. I am sure that you can be successful without it. This was just a personal preference for me.

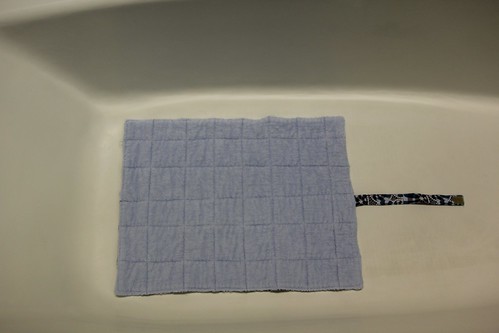
IMG_5753
(Yes, I'm not proud. Took this shot in the bathtub in my hotel room in Chicago.)

The only other tiny snag I caught along the way was when it came to the straight-line quilting. It only happened twice (once stitching width-wise and once stitching length-wise) and there is an easy solution. Since you're sewing through so many layer you might find a tiny bit of fabric bunching as you're nearing the edge. If this starts to happen I suggest stopping before you hit the top stitching seam along the edge. Pull out your needle and flip the pad around then match up the quilting line from the other side and back stitch when the two lines meet. It completely eliminated the bunching for me. I hope that makes sense. I am sorry I don't have pictures to show you what I mean visually. Again, I was in a hurry with this project. If you come across this problem and need help let me know and hopefully I can explain it better.

IMG_5755
(This one's in the bathtub too but looks better.)

One last note. I had another blonde moment when I was making the strap. I left both ends raw and forgot to finish one end. To rectify this I just top stitched along the exposed raw edge and trimmed as close to the stitch line as possible. But I implore you not to make the same dumb mistake I did. Aside from that this pattern was super simple and I honestly made it in a matter of two hours before I rushed off to the airport. It's so quick and easy I even considered whipping up a second one for another friend but she's not due until October so I refrained myself. And I made it to coordinate with The Everything Bag (Pattern J), which happens to be the project I'm showcasing next week!

IMG_5526

So what are you working on? Link up your projects (in whatever state they're in) and show us what you're making from the book. If you're linking up stop by and see what everyone else is working on so we can all help each other out and give each other props. And remember, you can also share your "Little Stitches" Sew-Along projects anytime on the Undercover Crafter Flickr group found here. See you next week!


Tuesday, July 26, 2011

More Commissions and Some Chickens

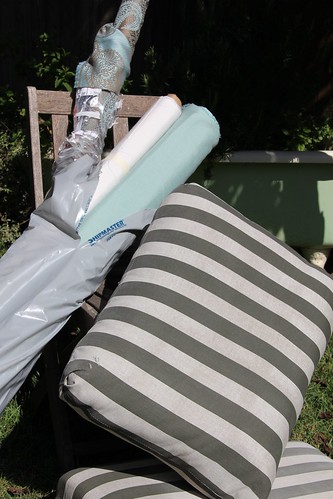
The past few weeks have been so busy that I haven't really had any time to sew. But I did get a couple commissions. My friends just moved into a gorgeous new house on the Canals and they want me to re-upholster their patio furniture. I just got my shipment of Sunbrella fabric so now I just need to pick up some thread and zippers and I can get to work.

IMG_5843

Another friend of mine wants me to make a scrappy table cloth for her mother-in-law-to-be as a thank you for the Engagement Party that she's throwing them. She and her fiance are going fabric shopping this weekend so I can get started on that one.

And we got our chickens!

IMG_5807

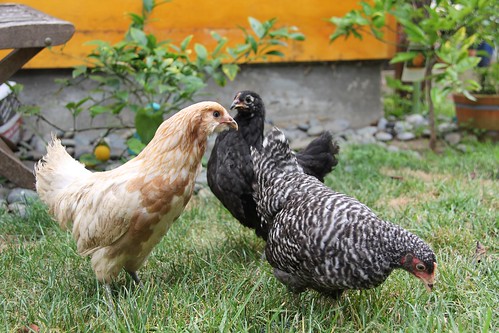
They're actually quite fascinating and a lot more entertaining then we thought. They're about 10 weeks old so it will be another 2 months before they start laying eggs but I'm trying to get them socialized early so they get used to being handled. Ella is the black one. She's a Black Australorp and quite shy and submissive. Unfortunately it's clear that she's the lowest in the pecking order and the other two will step on her and she just takes it. Mercedes is the black and white one. She's a Barred Plymouth Rock and she's got a ton of personality and 'tude. Brooks is the blonde one and she's an Easter Egger, which is basically a mutt in the chicken world but the cool thing is she will lay either green or blue eggs while the others will lay brown ones. Brooks is super curious and follows me around when we let them out in the yard. Mercedes and Brooks are currently duking it out to rule the roost. Okay. I swear that's it with the chickens. Back to sewing now.

Saturday, July 23, 2011

Little Stitches Addendum

Stephanie had a great question regarding the Little Stitches Sew-Along. She wanted to know what project I'm working on this week. I debated putting this up. At first I was going to add my project for the week at the end of every post so people could choose to work on the same project as me if they wanted. At the last minute I opted out of adding that nugget. I guess so people could feel like they could work on any project in the book they wanted to not just the one I am working on. This remains true. Anyone wishing to join in the Sew-Along can show off any project their working on or have finished that week but for those of you who want to work on the same project I am so we can share if we're finding bumps in the road I'll give you a heads up of what I'm working on for the next week at the end of each Thursday post. So wanna know what I'm working on this week?

IMG_5726

I'm working on the Changing Pad that can be found in Project K in the book. It's again for Kerry's miracle baby boy. Check back on Thursday to see my finish and link up your progress. Don't forget about the Flickr group where I'm creating topics specific to each project in case someone is struggling with a particular pattern it's a forum where you can get help from others and another place to show off your finishes.

Thursday, July 21, 2011

Week 1 - Pattern G

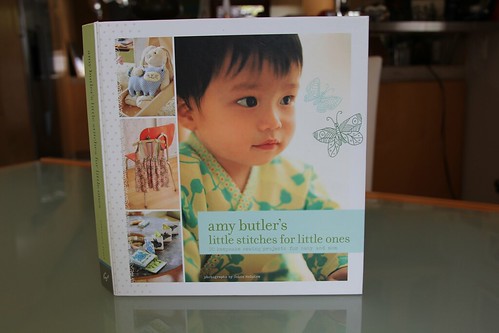
Welcome to the Amy Butler “Little Stitches for Little Ones” Sew-Along. My goal is to sew my way through this amazing book one project at a time. Each Thursday I’ll be sharing my finish for the week with you and I encourage anyone who wants to join in and sew along with me to link up and share your progress and finishes. You don’t have to keep up with my pace and you can link up your project in any state; from picking out fabrics all the way through to your finishes. Having a problem on a project? Link up and maybe I or someone else in the sew-along can help you. Link up when you can. Go at your own pace. And most of all have fun!

Pattern G - “Cutie Booties” - Difficulty Level: 3

IMG_5650

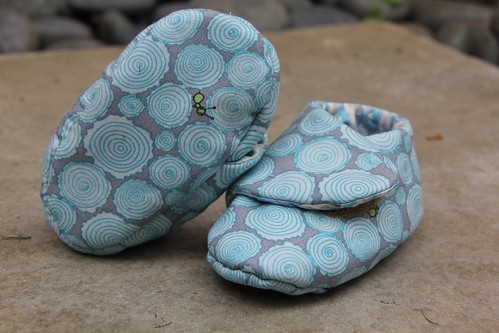
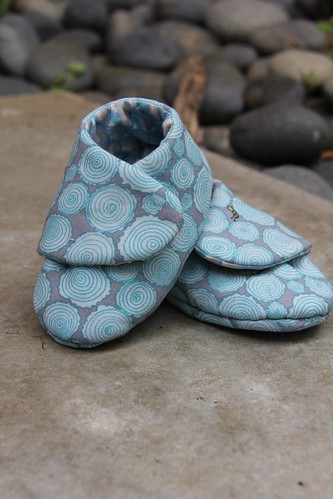
This week I decided to make something for my friend Kerry who is having a little boy in August. I call him the miracle baby because Kerry and her husband John journeyed down a very long and difficult road to get where they are and their little boy is one lucky kid to have Kerry and John as his parents. There are always so many cute things out there for girls, but the boy stuff seems less available so when I saw these booties I knew I had to make them for Kerry’s little boy. I went to my stash and pulled out some Oliver + S City Weekend and a print from Jay McCarroll’s line Woodland Wonderland. I just love the little ants on this print and I thought the idea to have the ants on the soles of the booties was super cute… almost as if he was stepping on the ants.

IMG_5712

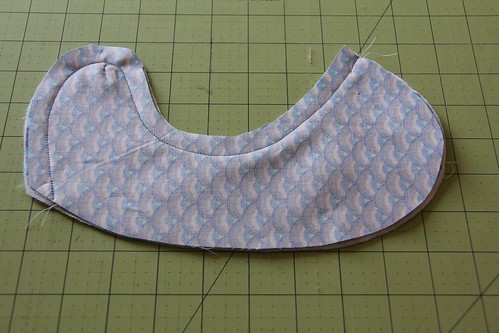
Since Kerry is due in August I decided to make the pattern for 6-9 months thinking that he would be ready to wear them come winter. Winters in Chicago can be dreadfully cold so hopefully these will help warm up his little toes. When I was cutting the pattern out I discovered that the toe of the sole pattern piece fits perfectly into the curve of the shoe top piece so I recommend sliding the sole up into that curve when you’re cutting out the fabric. It saves fabric and there’s a little less cutting. It’s not much but on curves every bit of cutting you can save counts!

IMG_5652

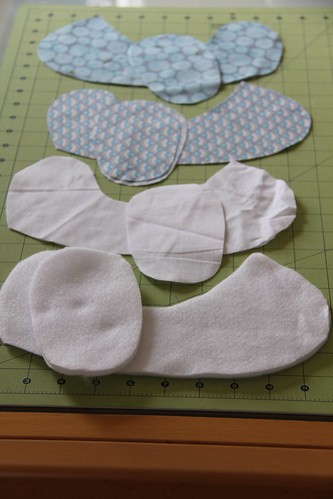
So the first mistake I made, and I make this one a lot, was I didn’t read the directions as well as I should. I always say I will be more careful about reading instructions and then I always get cocky and skim over the parts I shouldn’t. This is one of the many common mistakes that I could prevent but instead always make when sewing. You would think I would learn by now. Well, I cut out all my pattern pieces nice and neat like and go on my merry way only to discover later that I was supposed to cut FOUR not TWO of the soles from the fusible fleece. Thankfully that was a mistake easily rectified.

IMG_5657

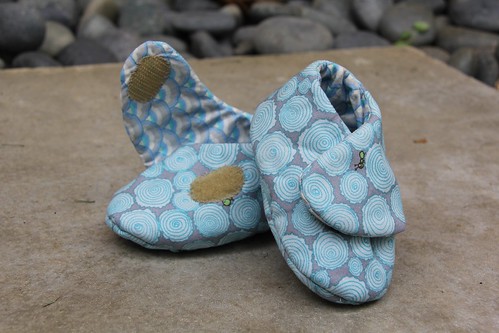
Making the upper panel was super easy. But make sure you attach the Velcro to the right places. Again, I was skimming and cocky and didn’t absorb the directions properly and I ended up attaching both the male and female pieces of Velcro to the exterior fabric NOT the female to the exterior and the male to the LINING like I was directed. Seriously I am really blonde sometimes! Since the upper panels were already sewn together I had to hand stitch the male Velcro onto the right place on the lining side of the upper panel and thank god I wear a size 3½ ring because I swear if I didn’t have child sized fingers I would have had to rip the whole upper panel apart and start over. And of course I was making both booties at the same time so I made the same mistake twice before I even realized it.

IMG_5658

All in all, this pattern was not as tricky as it looks. I whipped them up relatively quickly – like in a morning when I was waiting for the Sweet and Adorable Husband to get out of bed after he partied a little too hard the night before. (Oh, he’s going to kill me if he reads this!) I would say maybe 3 to 4 hours on the project – less if I wasn’t so dreadfully blonde. And the soles are hand stitched on which was fun. I love hand stitching and it helped me perfect my slipstitch. I have to say these booties turned out so darn cute! Really, I LOVE them and they were so much fun and easy to make I think everyone I know with babies is going to end up with a pair! I only the pattern came in adult sizes because I swear I would wear them all day long if I had a pair of my own!

IMG_5719

IMG_5714

So what are you working on? Link up your projects here and show us what you’re making. If you’re linking up try to stop by and see what everyone is doing so we can all help each other in the Sew-Along. And remember, you can also share your “Little Stitches” Sew-Along projects anytime on the Undercover Crafter Sew-Along Flickr group found here. See you next week!


Wednesday, July 20, 2011

My Quilt Story


Remember this quilt?

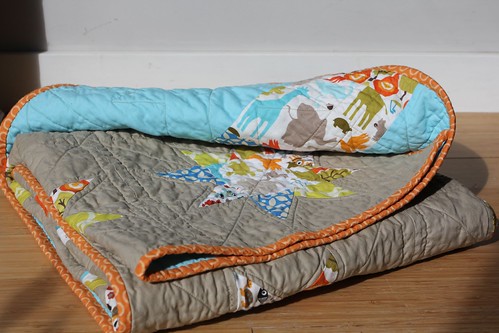
IMG_5034

Well it's being featured today over on Quilt Story! How cool is that? Hop on over to Heather and Megan's awesome blog and check it out! And stay tuned to tomorrow when I reveal my first finish in the Amy Butler "Little Stitches" Sew-Along. It's never to late to join in the sew-along fun hop on by and link up any time!

Monday, July 18, 2011

Winner, Winner Chicken Dinner For Reals

I'm back from a whirlwind in Tucson with a few announcements. First, the Quatreflowers quilt brought in $100 for the scholarship fund to help new students travel with Up with People! I was hoping it would have brought in a little more, but there really wasn't a lot of activity in the Silent Auction in general. People didn't bid very much overall and kept the bids low but at least it made something!

IMG_5759

Secondly, Mr. Random Number Generator has picked a winner in the 200th Post / Little Stitches Giveaway.

Congratulations to number 30, Sarah who said...

"Thank you for such a wonderful giveaway. I have several people in my life expecting/new moms so the book would be very handy:)"

Send me an email with your mailing address, Sarah, and I'll pop your copy of the book in the mail to you. I'll be sharing my first project, the Cutie Booties, on Thursday.

Finally, while I was gone we had this installed at our house...

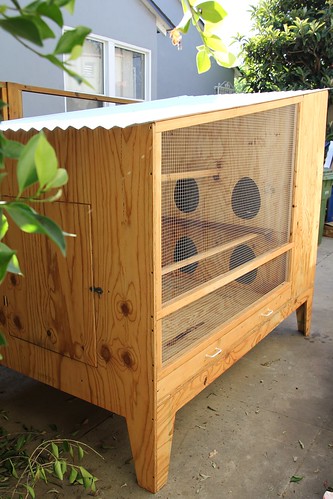
IMG_5784

We're getting chickens. And I promise this isn't going to become an urban farming blog. It will remain a blog dedicated to all things crafty, I swear. I'm just so darn excited about getting chickens. We're driving up to the farm this weekend to pick up our hens! Woo Hoo! If anyone wants fresh eggs just come on over to my house!

Wednesday, July 13, 2011

SUTK Round 2 Reveal

IMG_5557

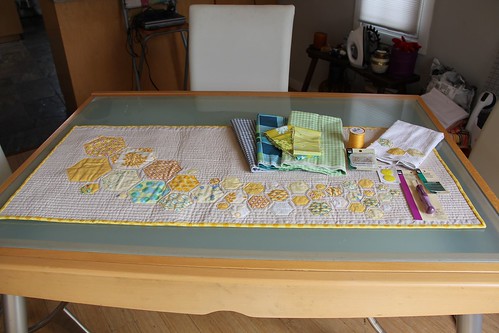
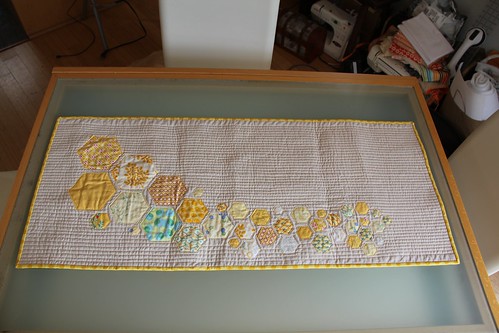
Whoopie! My SUTK package has made it's way across the Atlantic Ocean and landed safely at my partner's house so I can finally show it all to you. My secret partner was Wendy and she lives in the Netherlands. I started stalking her and immediately I knew what I was going to make for her. Wendy loves yellow and linen and really wanted a table runner. I almost instantly got to work, which never usually happens when I get a new swap partner. I usually let it simmer and wait to stalk a while before I get to work. Not this time. I dove into my stash and even cut into my coveted City Weekend to pull a plethora of yellows for Wendy and I took them with me on my trip to Hawaii to make my hexies in a variety of sizes. (It always makes me smile when I type hexies because the auto correct always changes it to hexes and makes me feel like a witch. Hee hee!)

IMG_5553

When I got home I pulled out some linen and started laying out the hexies in a pattern that had them spilling down over the continuous piece of linen. My one fear was the length of the runner. I initially made it long - like the runner I made for Missy. I even reached out on the swap message boards to see what size she might like and though Wendy (thankfully) answered most of my questions she forgot to answer the one about size, which was really the only answer I needed. All the other questions were merely diversions.

IMG_5552

Well, some of you may remember that I had the *brilliant* idea (note the sarcasm) to spray baste my hexies onto the linen and then sew them on once I had my quilt sandwich basted together. And this *brilliant* idea resulted in me creating a shorter runner than originally designed. Turns out that the new, shorter runner is the perfect size for Wendy's table and the original one would have been too long so I guess everything happens for a reason.

IMG_5559

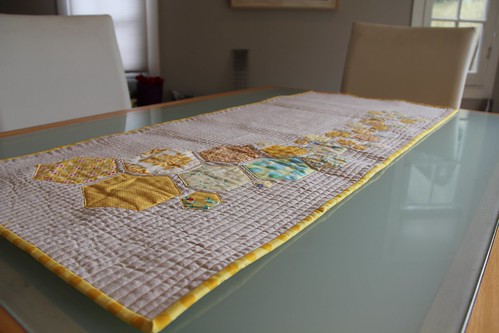
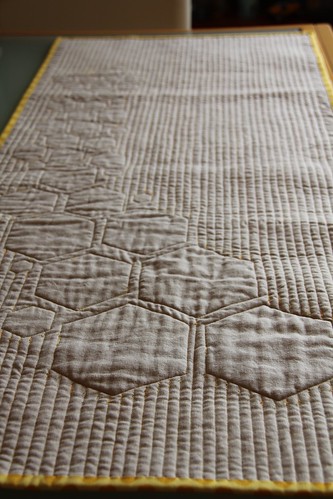
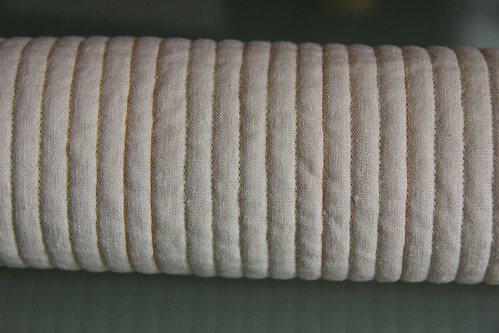
I ended up straight line quilting the runner using 100% cotton yellow variegated Gutterman thread and I added It's A Hoot Yellow Dots for the binding.

IMG_5560

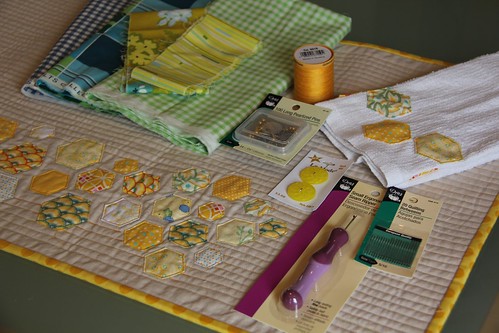
I made her a hexie bar towel to match, included some additional yellow goodies in my package and wrapped it all up in some Denise Schmidt fabric that Wendy had on her ISO list. I even used some Nicey Jane strips that I initially cut for the hexies as ribbon. After I cut the Nicey Jane (another favorite of Wendy's) I realized that it was too green-y yellow to match the other yellow fabrics I pulled so I opted to just send her the scraps instead.

IMG_5556

I totally fell in love with this runner and it sounds like Wendy is in love with it too which makes me so incredibly happy. Enjoy Wendy! I loved making it for you! P.S. If you're looking for the Amy Butler giveaway you can find it here!

Tuesday, July 12, 2011

Quatreflowers Quilt

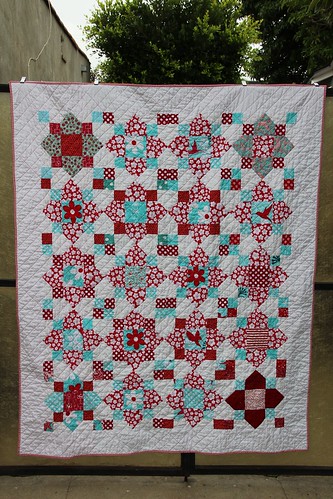
If you're looking for the Amy Butler giveaway you can find it here... In other news, I have another finish under my belt and I'm calling it "Quatreflowers" thanks to Nilya2011 on Flickr who thought that the quatrefoil blocks looked like flowers. Cool, huh? I finally found the motivation to quilt it last week and I bound it on my trip to Chicago this weekend. I pulled it out of the dryer this morning and it's all ready for me to take to Tucson tonight for the silent auction.

IMG_5759

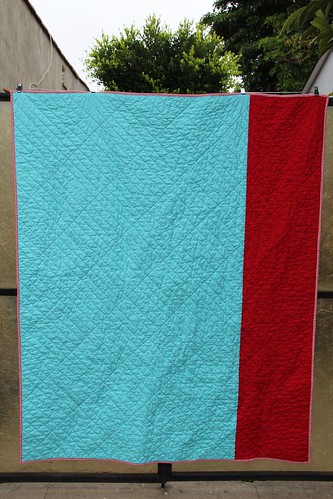
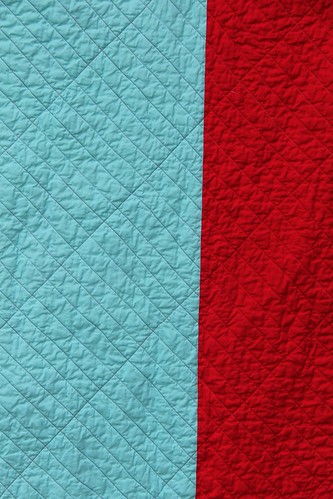
I decided to keep it simple and I just pieced the back with Kona Red and Kona Robin Egg.

IMG_5768


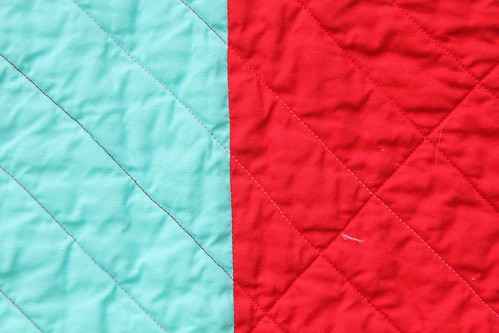
Then I used Gutterman 100% cotton variegated red thread to quilt it.

IMG_5762

IMG_5770

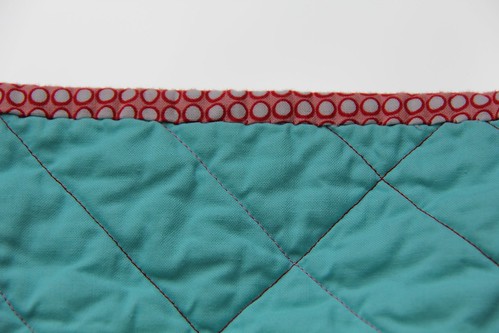
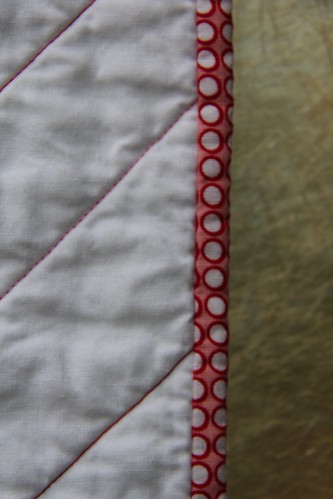
When I first picked up the red polka dot fabric for the binding I thought it was perfect but the more I stared at the fabric the more it made me dizzy. But I don't regret my decision. I think it was the perfect binding for this quilt. It actually works in small doses like this, just all en masse it was an eye sore.

IMG_5771

IMG_5765

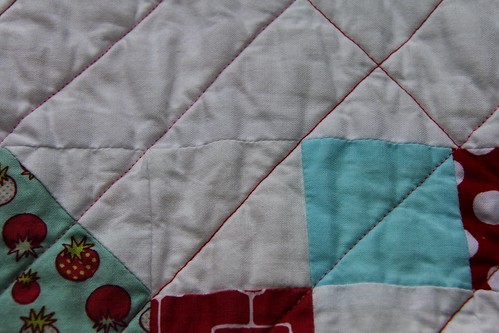
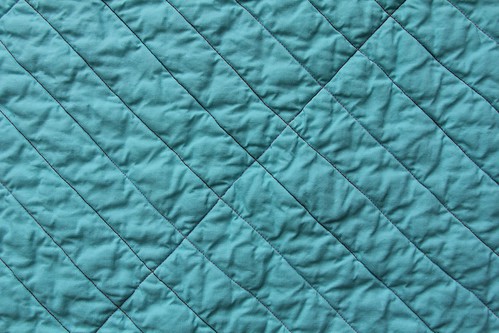
I decided to straight-line quilt on the diagonal and I was going to cross-hatch it but, honestly, after the first round of cross-hatching I decided it would take too long and I just wanted to be done with it so I stopped. I think it looks cool anyway so I could have said that I planned it that way but really it was just me being lazy. Shh! Don't tell anyone!

IMG_5767

IMG_5769

The quilt measures 66" x 54" and I need to thank all the members of the Red & Aqua 2 Bee who helped me create this beauty. You can find the pattern for the Quatrefoil Block here. I hope it will bring in a few bucks for the UWPIAA. This is the first time I have auctioned off a quilt so I don't know what to expect and I know there is at least one other quilt up for auction as well. Keep your fingers crossed! The money we're raising goes entirely to new student scholarships. I'll be in the sweltering Tucson heat through Sunday and I'll bring you a full report on Monday.

Monday, July 11, 2011

200th Blog Post Giveaway

GIVEAWAY IS NOW CLOSED!

A couple of exciting things are happening here in my world. First of all I got the official blessing from the
Amy Butler camp to host the "Little Stitches for Little Ones" Sew-Along. They're very excited about it and will be checking in on our progress to see all the awesome little projects that we make. How cool is that? I'm going to be starting up next week, so get ready.

IMG_5650

I'll post a new project every Thursday starting July 21st. This week I'm going to be working on the Cutie Booties (Project G in the book). I'm making them for my friend Kerry who is having a little boy due in August. I thought that a little boy is a perfect excuse to cut into my coveted City Weekend and Jay McCarroll Woodland Wonderland. Aren't those ants so cute? Obviously, I'm not going to be working through the book in order and you don't have to either. You don't even have to be working on the same project I am. I know that a project a week is a big commitment for many of you. You don't have to be as ambitious as I am just link up and join in whenever you feel like it. I will host a linky party each week so you can link up your projects (either in progress or finishes) for everyone to see. And I also started a Flickr group as an additional space to show off your progress or get advice from me or other members of the group if you're having trouble on a particular project. You can join the Flickr group here.

IMG_5591

And I said that there were a couple exciting things going on, right? Well, I just realized that this is my 200th blog post! Seriously, who know I would reach 200 posts?! Not I, when I started this little blog last year. No way! So to celebrate I'm going to give away a copy of "Little Stitches" so you can join in the fun. And don't worry you can still enter and win even if you don't have the time to join in the sew-along fun, I just thought nothing could be more appropriate. So how do you win? I'm not going to ask you to become a follower or blog about this. Please, only do that if you want to. Nope, all you have to do is simply leave me a comment. Any comment will do.

The Fine Print: One comment per person, please. International entries are always welcome. I'll leave the giveaway open until Sunday, July 17th. Good Luck!

Friday, July 8, 2011

SUTK Round 2 Received

IMG_5728

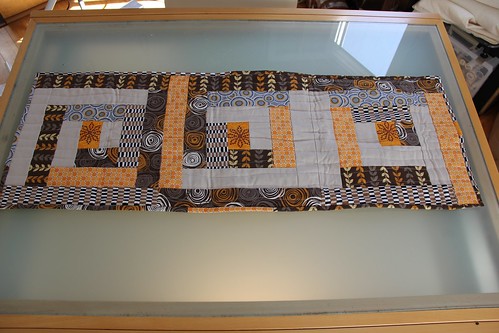
The goodies just keep coming. My SUTK package hasn't arrived to it's final destination so I can't make the big reveal just yet but I did receive my package. Kristy of St. Louis Folk Victorian had me and she created a modern table runner that's just the perfect size for our dining room table.

IMG_5732

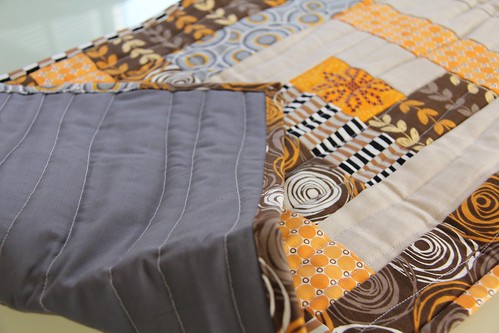
I love the Kona Coal she used on the back!

IMG_5733

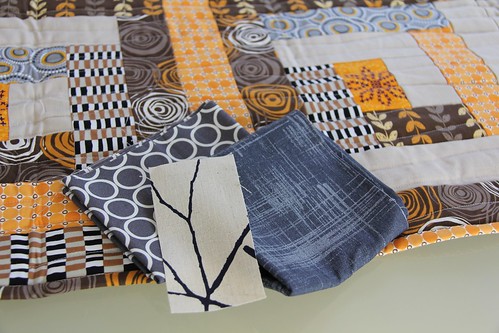
The colors she used also compliment our decor really well. And she also included some awesome fabric scraps! Woot! Thanks so much Kristy! Can't wait to show it off at my next dinner party.

Thursday, July 7, 2011

PTS5 Received!

IMG_5734

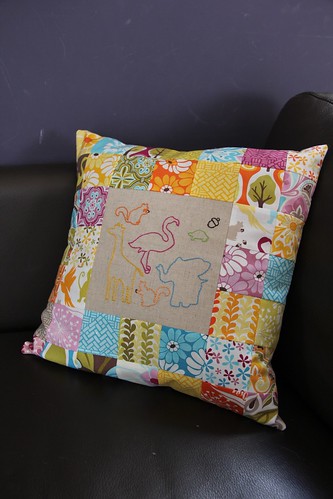
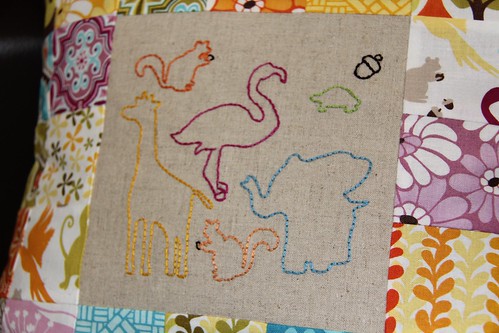
The great things about swaps is that you give something away and get something in return. In the Pillow Talk Swap I got this adorable Central Park inspired pillow made by the talented Safieh. She used a mixture of linen, Kona Stone and some Kate Spain (a favorite of mine) to create this wonderful pillow.

IMG_5736

She even added some hand stitching in the center to emulate the animal print in the Kate Spain Central Park line. Included with the pillow were the rest of the charm squares she used from the Central Park line so I could make something to coordinate.

IMG_5735

Thank you so much Safieh! Can't wait for the next round!

Wednesday, July 6, 2011

Pillow Talk Swap 5 Reveal

IMG_5566

I can finally reveal the pillow I made for my partner in this round of the Pillow Talk Swap! As luck would have it, my secret partner was the talented Darci of Stitches and Scissors. If you haven't had a chance to check out her blog you really should. Darci is super sweet and so talented and she also hosts the popular Spicing Up The Kitchen Swap on Flickr. She also has a great eye. Darci had me in the SavVy Seasons Swap last fall and made me a cute table runner that was perfect for my Thanksgiving table, a matching dish towel that has a permanent residence on the handle of my oven, and a super cute mug rug that lives on the desk in my office, in fact it travels from job to job with me. So the pressure was on to return the favor. In all honesty, I was actually thrilled that I could return the swap favor to Darci. Opportunities like this don't happen very often.
IMG_5422

I had a good sense of Darci's likes since I have been loyally following her blog since I received her awesome package back in October. I knew that Darci loves scrappy and green (which is my favorite color too) and I started to stalk her to find out some of her favorite fabrics and designers. I really wanted to include some of her favorites or ISOs in what I was making for her. I also know that Darci has two gorgeous girls and is not afraid of a little whimsy.
IMG_5399

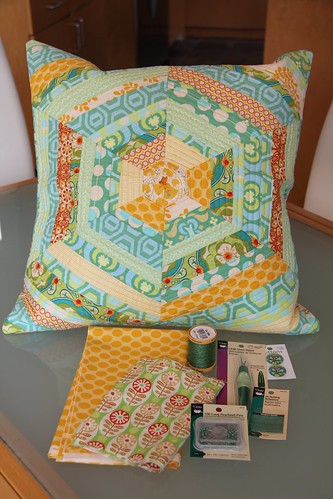
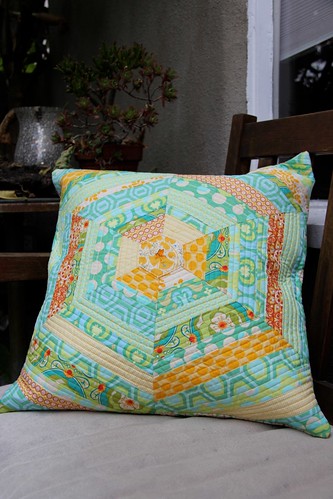
I had a different plan for her pillow initially but then she posted a comment about the hexagon table runner I was making in another swap and I got an idea and ran with it. I knew that Darci also loves spiderwebs and string blocks so I gathered some of her favorite fabrics (Midwest Modern, It's a Hoot, Park Slope) and decided to make a hexagonal string pillow.

IMG_5397

I wasn't sure if my idea was going to work at first but I drafted a paper template and thought I would give it a shot. But I also took a risk and left the center open so I could put an unbroken, whimsical hexie in the center. Much to my surprise it actually worked. I topstitched the center hexie on and used straight line quilting with variegated yellow cotton thread.

IMG_5423

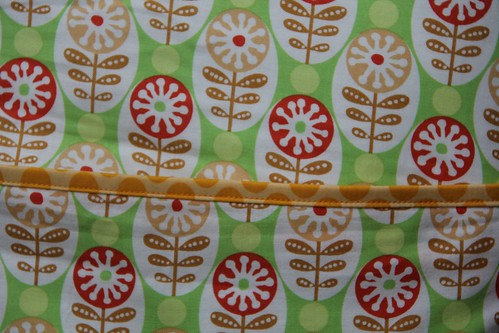
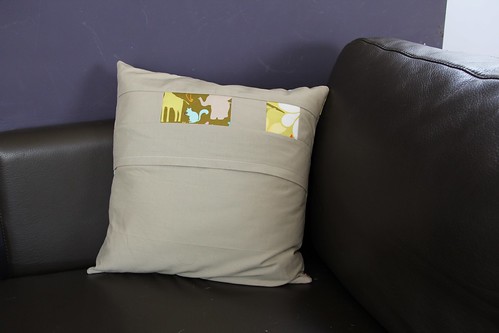
I kept the back simple using some Park Slope (one of her favorites) and made an envelope opening. She had also mentioned that she was wild about the It's a Hoot yellow dots, again in a different swap (how fortuitous) so I used that to finish off the back.

IMG_5427
IMG_5428

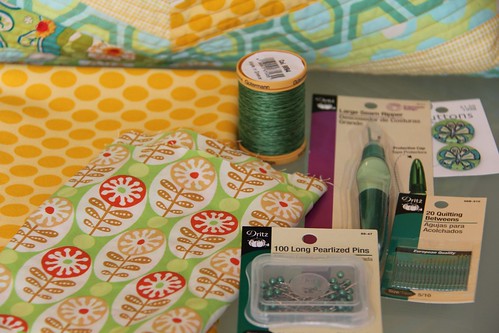
I rounded out the package with some large Park Slope scraps I had left over since it's one of her favorite lines. And she lucked out because that It's a Hoot Yellow Dots that she had on her ISO list was still in stock at the Urban Craft Center so I picked up half a yard for her. Then I threw in a 20" x 20" pillow form and some useful tools in her favorite color (green) to round out the package.

IMG_5564

This was a tough one to part with for sure. I fell in love with this pillow and I hope that Darci feels the same! I really, really loved making this for her and it was a great feeling being about to return the swappy love.