Tuesday, August 30, 2011

Tool of the Day: Design Wall

Welcome back to Triple T Tuesdays! Today I want to wax poetic about one of the tools I love so much... the Design Wall. When I started sewing I was primarily garment construction so I never had much need for a design wall. A dress form was more my style. But once I started quilting it all changed. Design walls come in many different shapes and sizes and range from the uber portable to permanent built ins. No matter if you're just starting to dabble in quilting or if you're a professional, a design wall can be one of your most useful tools.

IMG_6005

Most design walls have a white or neutral background that allows you to focus more on your quilt layout instead of distracting from it. They can be as simple as a piece of plain white flannel that you can roll out and hang if you're on a tight budget or don't have a permanent space. The advantage of using something like this is the ease of travel. Simply add a few grommets to the top and some ribbons and you can hang it anywhere.

IMG_6006

Using a fabric lined wall allows you to put your quilt squares up and take them down with ease and without the use of pins. The fabric sticks together thanks to the miracle of static cling! Do you have a design wall? What does it look like? What's on your wall right now? Mine's sparse at the moment but I'll be getting the red stripe quilt up there very, very soon!

Monday, August 29, 2011

MMM Summer Package Received

Happy Monday my lovelies! I am so sorry that my posts have been sporadic as of late. I also can't believe that I missed posting last week's Little Stitches Sew-Along project. My real life has been a bit hectic and I'm being pulled in a million different directions. I wasn't supposed to be out in the field on this project. I was only supposed to be snugly in my office for the duration but things change and I was thrown a bit of a curve ball so for the next month I'll be trying to balance managing my team in the office as well as the teams in the field. Unfortunately being in the field means long days and it wipes me out. When I get home I just want to pass out. Please bear with my for the next month when things will eventually normalize.

Just because I'm working hard doesn't mean that there aren't wonderful surprises that end up on my doorstep to brighten my day. I received my package from my partner in the MMM Swap, which is really my favorite swap on Flickr. I received such a sweet package from the lovely Amber of Wambers Whimsies. She made me exactly what I wanted... linen napkins!

IMG_5991

I love the purple she used to trim them. I know the trim gave her a bit of a headache but I so appreciate the effort she put into them! They're just perfect and they totally match the awesome place mats (that we use all the time) that Bek made me in another swap. Amber also sent me three favorite fabrics! You know I love me some City Weekend! And I also got some much loved fabric from Amy Butler and Kate Spain. She rounded out the package with a delicate necklace and a super cute City Weekend pincushion. I love it all!

My package, it seems, is still in transit to my secret partner. I'm just dying for it to arrive on her doorstep so I can reveal it to all of you.

Wednesday, August 24, 2011

Yard Sale Find

Last weekend was Yard Sale City in my neighborhood. It seemed like everyone was trying to unload their unwanted goods off on their unsuspecting neighbors. We love checking out garage sales. Most of the time we don't but anything but this weekend I found this...

IMG_5959

Without knowing what what inside of it I scooped it up for next to nothing and took it home. At the very least I was intrigued by the vintage thread it contained.

IMG_5962

Once at home I sorted through the treasure chest and found a plethora of vintage threads and buttons which was enough to make the purchase worth it for me. I'm planning to display the thread along side my collection of vintage thread I inherited from my grandmother once I get my studio organized.

IMG_5963

Same with all the buttons. I'm envisioning a giant glass vase full of them. Of course, I will put them to use when I find the proper project.

IMG_5968

Some of what I found was crap, but I'll add the vintage patterns to my collection and I love the vintage notions. They're showing some wear and tear but I still find them charming.

IMG_5967

IMG_5966

IMG_5964

And, while some of the scissors are going right into the junk drawer (hopefully my husband will start using those instead of reaching for my precious sewing shears) I did luck out and I'm now the proud owner of a "new-to-me" set of sewing and pinking shears.

IMG_5969

For some reason, this needle book from the 1940s might be my favorite thing in the box. I might frame it.

IMG_5970

Not a bad find for a yard sale I think.

Tuesday, August 23, 2011

Rotary Cutting Tips

It's Triple Threat Tuesday! Sorry that we missed out on one last week, but I think the Kona made it worth it, don't you?

IMG_5995

Today I want to share a simple tip to help out when you're using your rotary cutter. I'm sure that this is sewing 101 but I'm a lazy sewer and I used to just line up my ruler and slice away at fabric in any old direction that suited me. Well, sometimes rulers slide and blades can end up cutting what they shouldn't so here's what I do to help protect that precious fabric from getting snipped where it shouldn't.

IMG_5998

I always square up my fabric against my cutting line on my mat and then I lay my ruler over the main piece of fabric, using my ruler to "protect" the piece I don't want cut. This way if my blade accidentally slips then it will slice the fabric I don't care about and not the piece I need complete.

IMG_6002

Lastly, remember to apply pressure towards the top of your ruler. I always find that if my ruler is going to slip it happens when I am nearing the end of my cut. Applying pressure closer to the end of the cut helps me keep my ruler firmly in place. It's just another way I've found to preserve my fabric when I'm cutting.

IMG_6001

Hope this helps! Do you have a Tip, Tool or Technique that you'd like to share? Email me to guest post on Triple Threat Tuesdays.

Monday, August 22, 2011

Blogtastic 2.0 Winner

Thank you to everyone who entered my Blogtastic 2.0 Giveaway! I really love hosting giveaways. Aren't they so much fun? I want to thank all of my loyal followers for sharing in the fun and extend a big welcome to my new ones. I hope you enjoy it over here. I know you're all chomping at the bit to find out who won this super-duper prize. I'll let Mr. Random Number Generator do the honors...


Congratulations to #254... lavindersmiles said... fabric...best kind of prize

I've sent you an email and I'll be sending you your prize shortly.

Tuesday, August 16, 2011

A Blogtastic Giveaway!

**Giveaway Now Closed**

It's been a crazy week and it's only Wednesday. I am sorry I missed posting the second edition of Triple Threat Tuesdays. I just had some craziness happen at work and it, unfortunately, disrupted my flow here on my blog. I will also be postponing tomorrow's Little Stitches Sew-Along (because of the work craziness) with the promise that both features will return next week.

Photobucket

The good news is I have an amazing giveaway to share with all of you. I am participating in the amazing Blogtastic Extravaganza 2.0 organized by My Silly Monkeys. There are 100 blogs participating so be sure to join in the blog hop and check out all the amazing blogs participating in this round. There are lots of good prizes to be had all around.


So you wanna know what you can win? I want to help one lucky reader build their stash so I'm giving away TWO (that's right two!) Kona Fat Quarter Bundle. You'll get a Poseidon bundle and a Greener Pastures bundle. That's 42 fat quarters all for one lucky reader! You have two ways to win.

1) Leave me a comment.

2) If you're a follower or become one leave me a second comment for a second entry.

It's that easy.Two entries per person. International entries welcome. Please make sure I have a way to contact you if you are a "No Reply" blogger. The giveaway is open until August 21, 2011. Good luck!

Saturday, August 13, 2011

Action Kivu Fundraiser


If you haven'e already heard, Alissa (of Handmade By Alissa and also the awesome woman who taught me how to quilt) is hosting her second annual Action Kivu Fundraiser. Her twin sister, Cate, works with this amazing non-profit that teaches women in the Eastern Congo how to sew, thereby helping them to learn how to support themselves and their families. It also helps send children to school so they can get an education. Many of these women are victims of rape, which is used as a weapon of war in the Congo. Alissa's goal is to raise $15,000 and there are two days left to help her reach her goal. If you can, please go an donate. Every contribution matters, regardless of how small. And don't just donate because of the prizes - donate because this is a great cause.

Friday, August 12, 2011

New Fabrics Just For Me

IMG_5956

I finally bought some fabric for myself. I can't believe it. I was shopping online for fabrics for my MMM partner and stumbled across the gorgeous Heirloom line by Joel Dewberry and I had to have some. They also got some Wrenly in stock so I swooped it up.

IMG_5957

From the Heirloom line I piked up two yards of the Ornate Floral in Amber and a half yard each of the Opal in Jade and the Tile Flourish in Amber. They're all voiles, yummy, yummy voiles.

IMG_5958

I intend to make myself a dress out of the Ornate Floral and I think I want to use the other two to make myself a skirt. As soon as they arrived I knew I didn't order enough of the two prints I got as half yard cuts. I think I want more. This fabric is just so delicious. Of course, I don't know when I will have the time to actually sit down and make something just for me. This weekend I need to finish up my package for my MMM Partner. I've also got a couple commissions that I'm working on and the gift for my Solids Swap Partner. Sigh... Someday I'll have a pretty, pretty dress, just for me. What are you working on this weekend?

Thursday, August 11, 2011

Little Stitches Week 4 - Pattern D - Kimono-Style PJs

Welcome back for another week to the Amy Bulter "Little Stitches" Sew-Along. This week I made something for my friends Caroline and Ehren. I've known Care and Ehren for almost 20 years. The three of us traveled the world together for a year in Up With People. We arrived in Denver that fateful July as total strangers and came away a family. Well, I'm only "family" in the figurative sense but they literally became family soon after our tour ended. They met, dated and fell in love on the road. They have two gorgeous and wonderful children, Luke who will be (gasp!) 16 in October and Mayah who's about to turn 14. (When did we get so old?) Then this winter, much to their surprise, they discovered that Baby #3 was on the way! This wonderful family welcomed Arden Adele into the world in July and I could not be more thrilled to be able to help keep her in fashion.

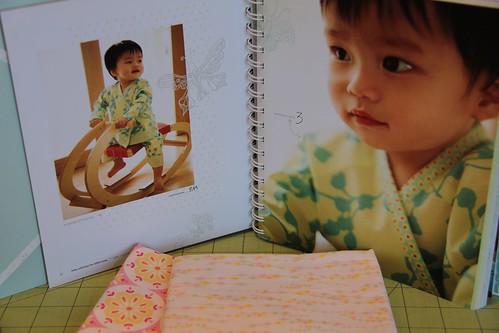
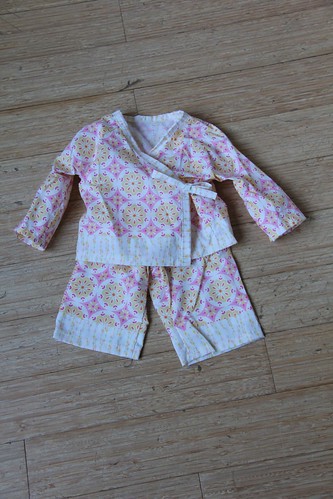
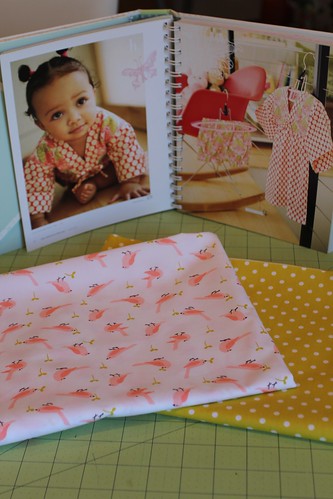
Pattern D - Kimono-Style PJs - Difficulty Level: 3

IMG_5160

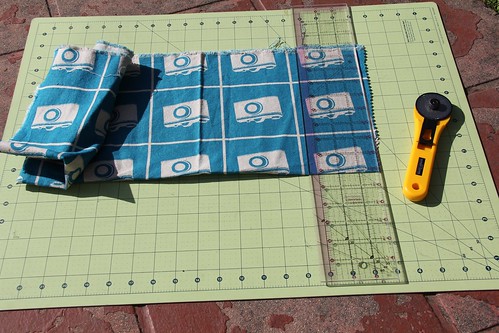
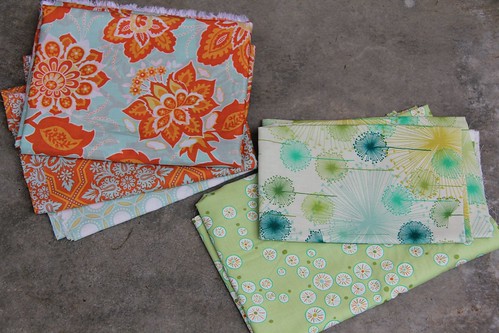
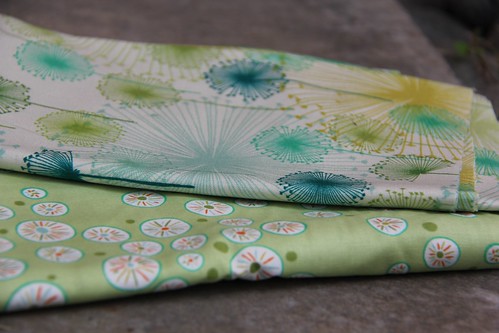
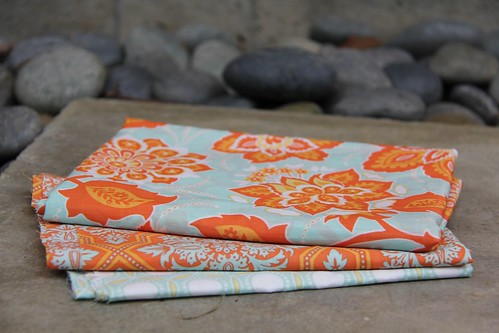
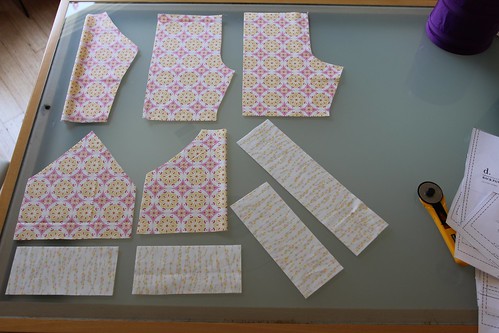
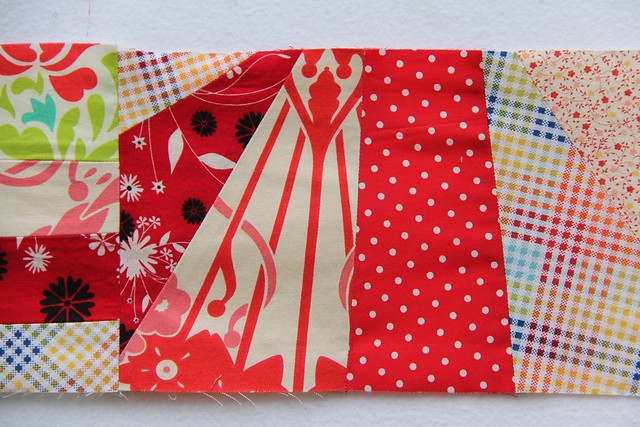
Care and Mayah helped me pick out the fabric (Living Elements Collection from Art Gallery Fabrics and Sweet Broderie by Rosalie Quinlan Designs), and I took the lovely fabrics they chose for Arden and ran with them! I had been wanting to make these super cute pajamas since the very first day I got the book and these super soft fabrics seemed perfect for sleepwear.

IMG_5356

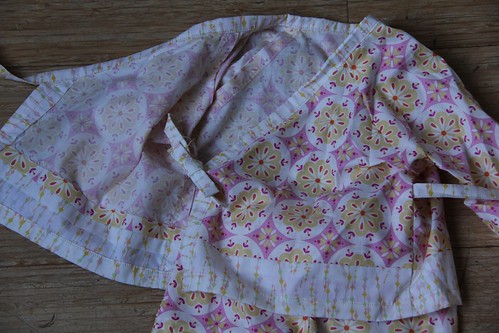
I have to say that this was one of the most straight-forward patterns in the book so far. These PJs came together quickly and easily. The little details, like the bias binding that frames the Kimono top really add a level of elegance and beauty to this outfit.

IMG_5358

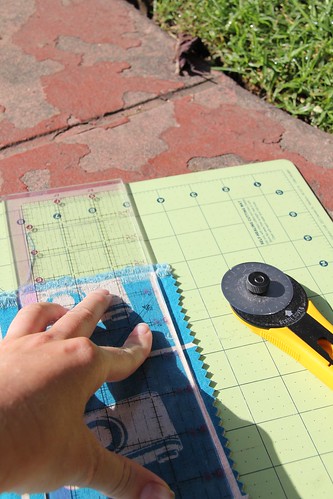
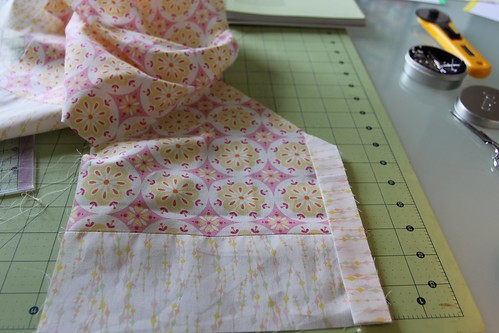
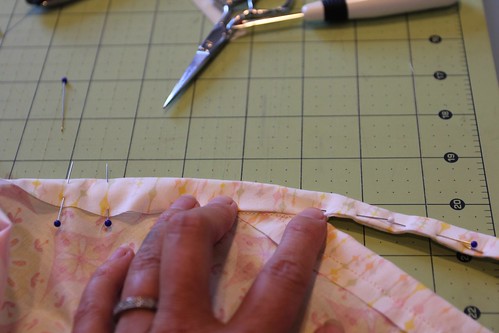
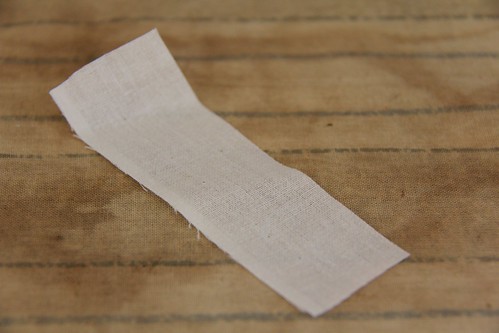
The pattern calls for 1/2" seams throughout which is especially important when attaching the bias binding. The 1/2" seam ensures that there is enough of the contrasting binding skirting the edge of the top.

IMG_5360

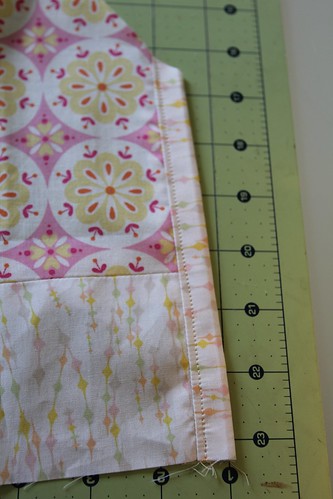
Topstitching is and easy and beautiful way to finish the binding seams but remember these stitches will be visible so if you're not as confident with straight stitching then just take it slow. I actually put a piece of masking tape on my machine to provide a guideline for my 1/2" seams to help keep them all straight.

IMG_5362

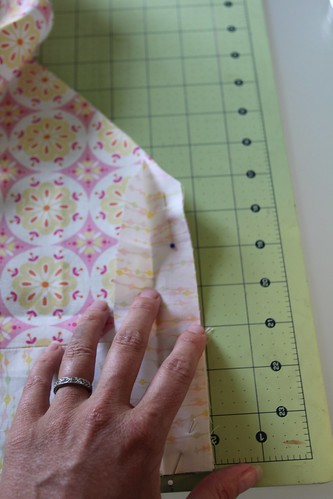
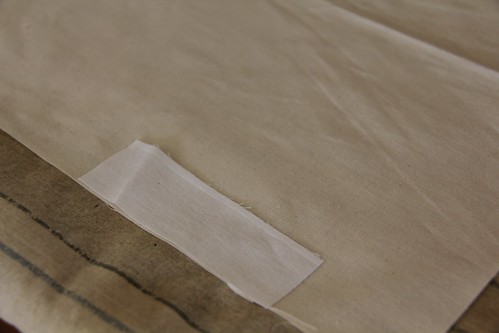
When you're attaching the remaining bias binding around the collar of the kimono top I used the seam line as a guide when I folded the binding onto the wrong side of the top. This is probably the trickiest part of the entire pattern and truthfully it's not all that difficult.

IMG_5374

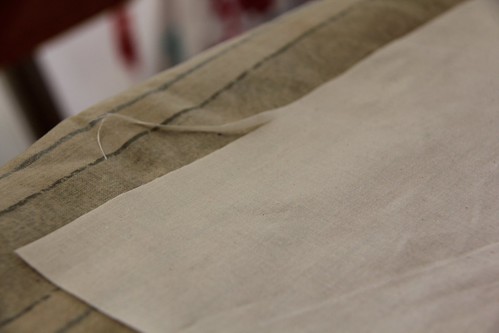
And don't forget to finish your edges (as directed) to provide a finished look to the binding. Part of this binding will end up being one of the ties for the Kimono.

IMG_5364

IMG_5604

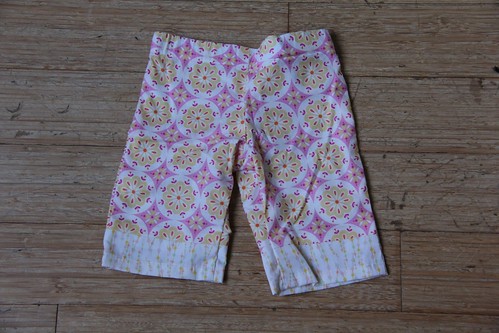
Making the matching pants is even easier than making the top. Seriously, this pattern was a breeze and the final result is to die for cute! Why doesn't this come in adult sizes?

IMG_5605

IMG_5607

The outfit comes in four pattern sizes, 0-3 months, 3-6 months, 6-9 months and 9-12 months. Since I wanted Arden to have stuff to grow into I made this in the 6-9 month size so it will be a while before she'll be modeling it for us. But I promise an update when she's wearing them.

IMG_5600

So what are you working on? Link up your latest projects here and show everyone what you're making. You can share your projects in any state from start to finish. Remember, you can also share your "Little Stitches" Sew-Along projects anytime in the Undercover Crafter Sew-Along Group on Flickr. See you next week when I'll be unveiling another cutie-patootie outfit for Arden. This week I'll be working on making her Pattern H, the Easy Empire-Waist Top.

IMG_4919


Wednesday, August 10, 2011

Playing with Strips

July was my month to design our quilt for do. Good Stitches and I wanted to do something a little different so instead of asking for two 12.5" blocks as usual, I asked each of the lovely ladies in the Hope Circle to send me one red strip measuring 48" x 6.5" instead.


The strips have been trickling in. I'm still waiting for the last two which are on their way and should be here any day but I just couldn't resist getting the strips already in my possession up on my design wall for a sneak peek.


I put the strips up randomly. I haven't even started to think about layout yet and I won't until I get the two final strips and make my own. I always wait to make my blocks (or in this case strip) until I've collected all the pieces so I can determine if I need to balance anything out.


Can I just tell you how much I'm absolutely LOVING how this quilt is coming together?! Seriously I think it's glorious in all it's scrappiness! The wonderful women of the Hope Circle have outdone themselves. There are so many little lovely details in each strip.

Look at the gorgeous prints Rachel used... (And she was afraid it was too Christmas-y. No Way! It's beautiful!)


And I the hippo print Suzy used in her strip is one of my favorites!


Muriël made a gorgeous cross strip...
(and even added some special goodies in her package that I didn't find until I opened it up last night! Thank you!!)


Kat added some super cool blocks into her strip...


I love Janet's use of prints in the tiny squares she incorporated throughout...


And check out the block piecing that Nicole
did for hers...


Lori's detailing really knocked my socks off!


I think I may be making more of these in my future!

WIP Wednesday at Freshly Pieced

Tuesday, August 9, 2011

Triple 'T' Tuesdays

I'd like to introduce a new feature here on the Undercover Crafter. Welcome to Tips, Techniques and Tools on Tuesdays (Triple T Tuesdays for short). I want to create a forum where we can share details on our process so we can all learn and grow in our sewing. I'll kick things off with a tip I'd love to share with all of you. I was working on a project recently and I made a pretty common "oops" that every sewer has made at one time or another.

IMG_5593

As I was cutting my fabric my rotary cutter slipped. This is so frustrating when it happens. I didn't want to throw the fabric into the scrap bin because it was such a little cut and such a large piece. I also didn't think that I had enough fabric left over to for the desired cut I needed. But it's not lost. Here's an easy way to salvage that fabric and no one will be any the wiser.

IMG_5594

Run to your scrap bin and cut a small piece of fusible interfacing just over the size of the cut. Make sure at least one edge of your interfacing is cut straight so you can line it up flush with the edge of your main fabric. Align the fusible side of the interfacing against the edge of the WRONG SIDE of your main fabric directly over the cut.

IMG_5596

Using your iron, fuse the interfacing to the fabric and wallah! Your piece is whole again. Likely this cut will end up in you seam allowance so no one will ever know your rotary cutter or scissors slipped.

IMG_5597

I hope this was a helpful Tip for all of you. I want to be able to share something new each week but not just me - YOU can join in too! If you have a sewing tip that's helped you work through a tricky project, or want to share a sewing technique you've perfected or even tell people about your favorite tool just email me and I'll hook you up to do a guest post. Let's all learn from each other!