Wednesday, November 30, 2011

FTLOS Redux

IMG_6804

My husband often complains that I am too nice. I like to make people happy, even complete strangers when I can, so when I heard the call go out for Angels in the FTLOS Swap I answered, despite my insane schedule. Megan paired me up with Charlotte since her partner went AWOL somewhere along the way. And for a moment I thought the pressure of turning around a spectacular and desired swap package in a short amount of time might prove too much for me. But I approached her as I would any other partner in any other swap - except this time I didn't post teaser pictures.

IMG_6799

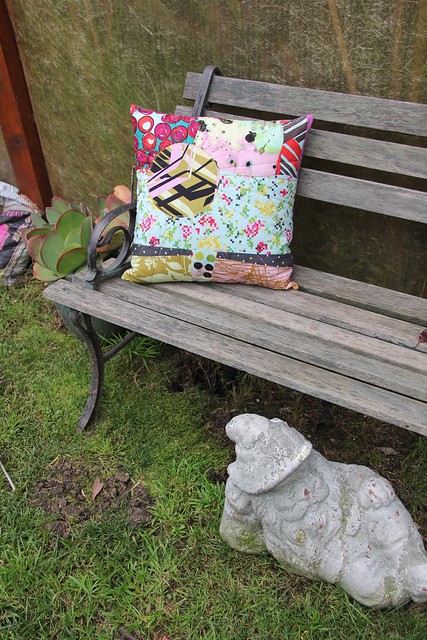
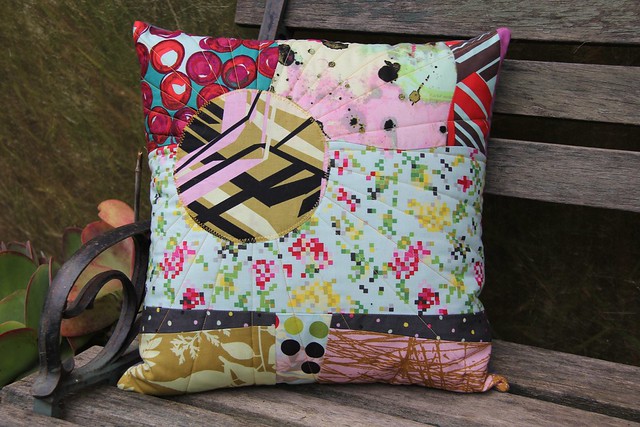
Charlotte had a couple things on her wish list, but the one that stood out to me the most was a floor cushion. I have never made anything like this before but it seemed like the thing she wanted the most so I decided to try it.

IMG_6795

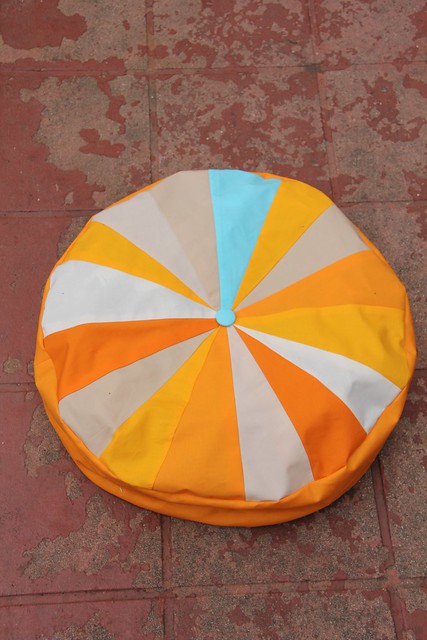
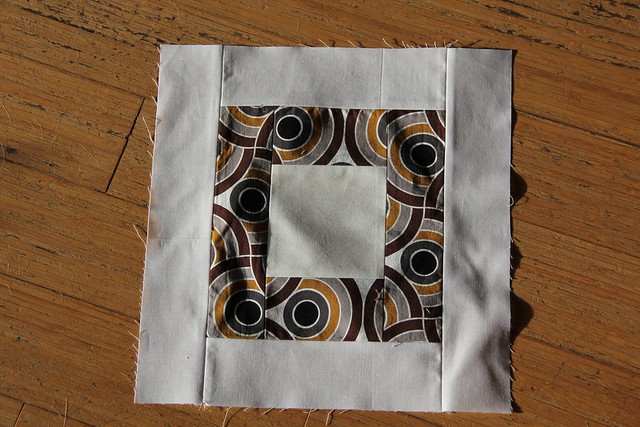
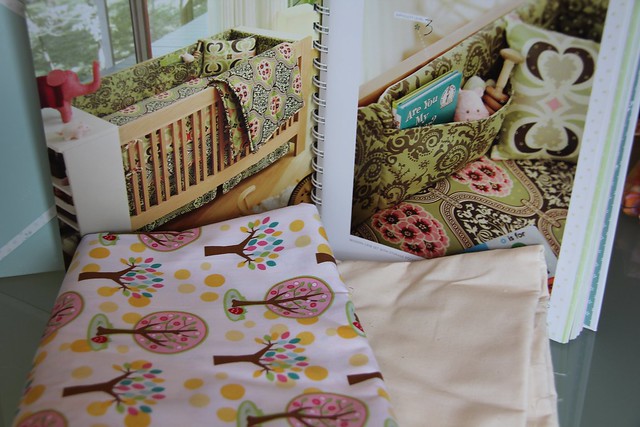
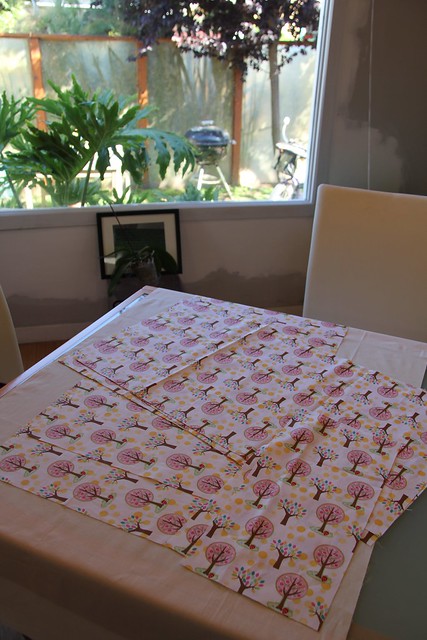
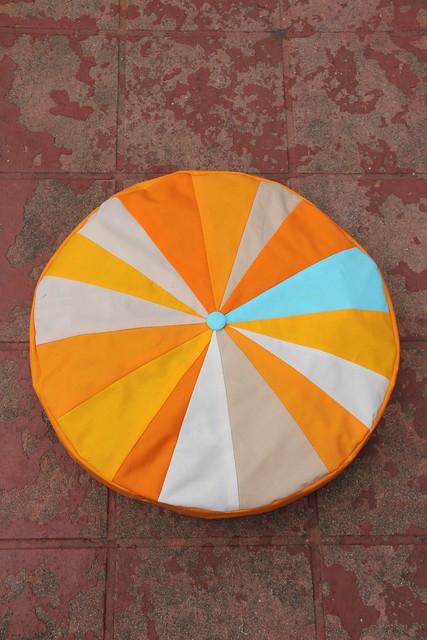
Her favorite solid is Kona Orange so I ran over to my favorite LQS, Sew Modern, and picked up some Kona Orange along with some coordinating shades of orange and neutral solids and threw in some Robin Egg Blue for a pop of color.

IMG_6779

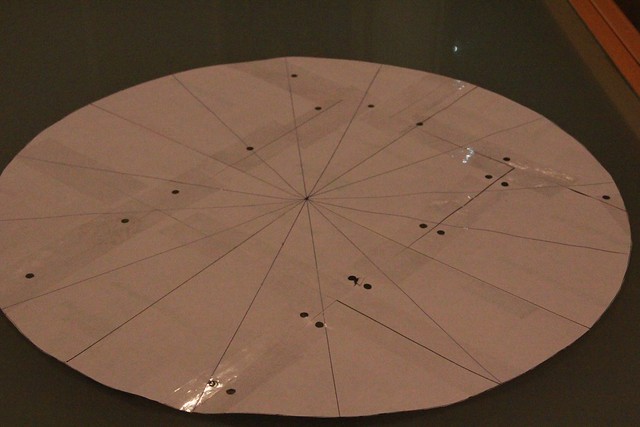
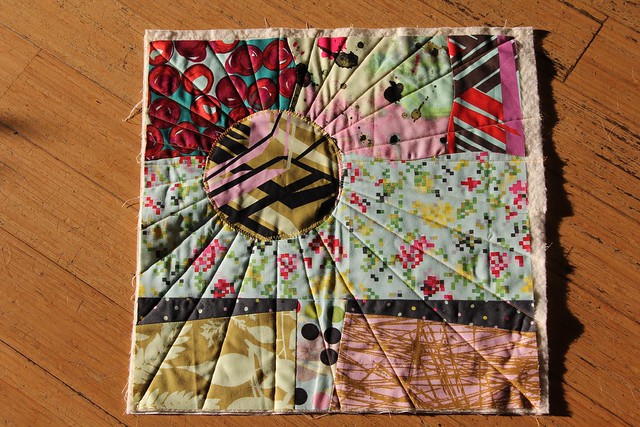
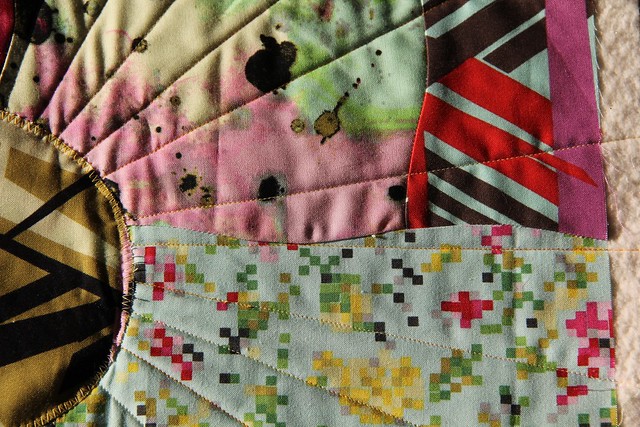
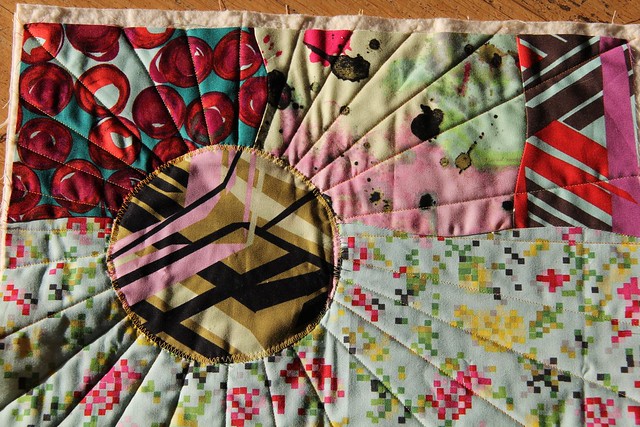
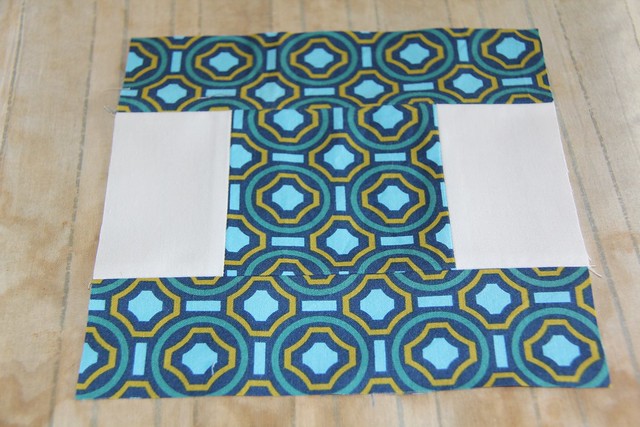
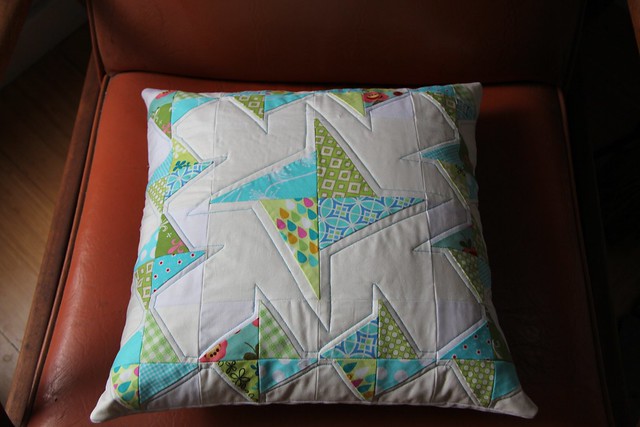
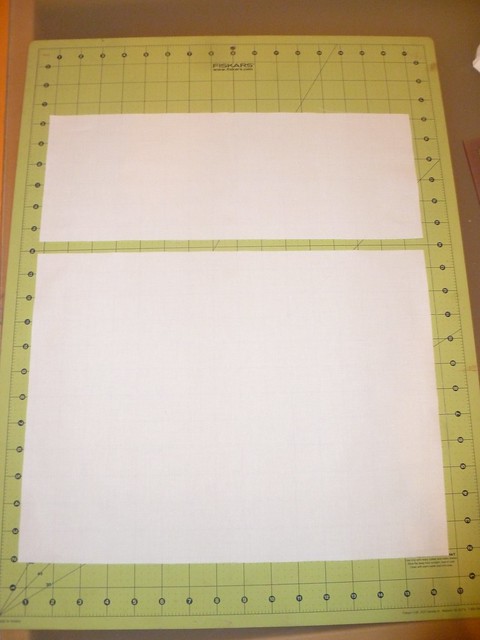
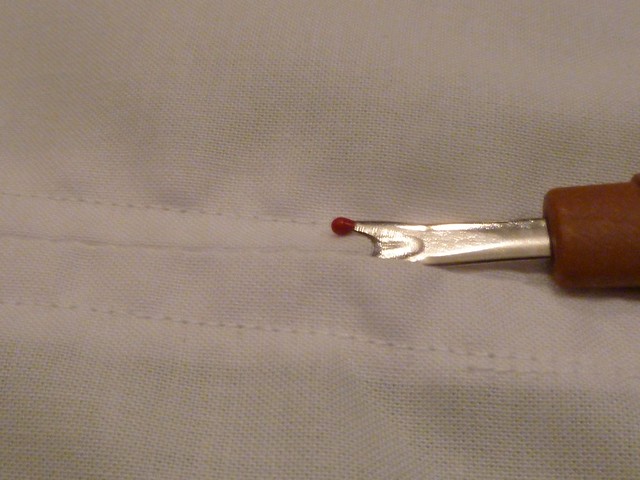
I decided that paper piecing was the way to go with this one and I started by drafting two circle patterns in the size I wanted. Then I traced out the pie slices so that all the points met in the middle and cut the circles into four pieces. I did make one stupid mistake, though... In my haste (but if I'm being honest it's actually due to my aversion to math) I forgot to account for the 1/4" seam in each of my quadrants so my points didn't end up as perfect as I imagined.

IMG_6798

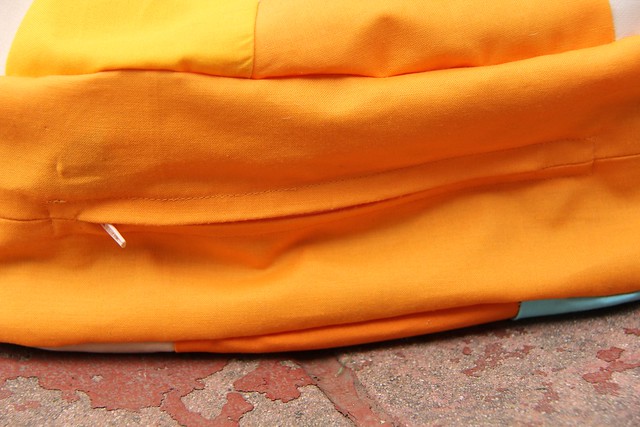
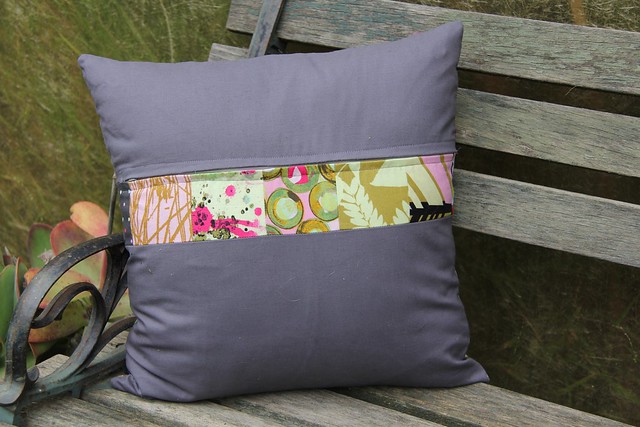
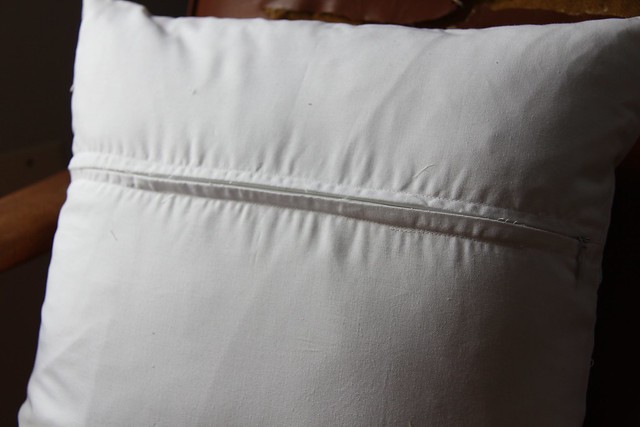
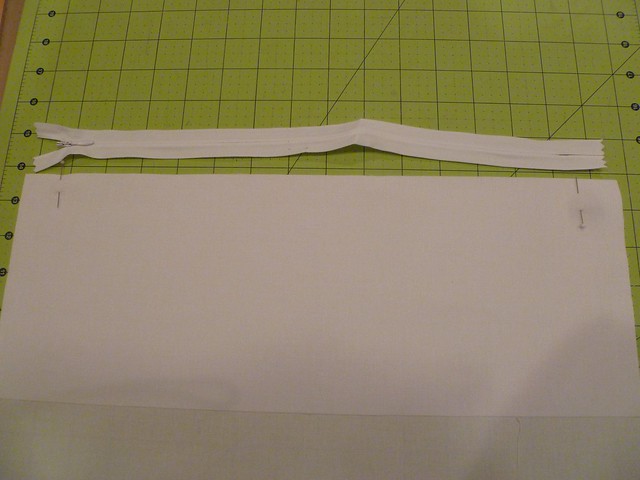
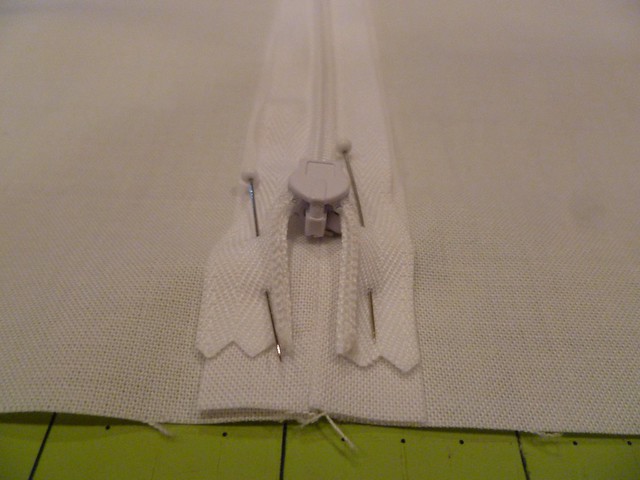
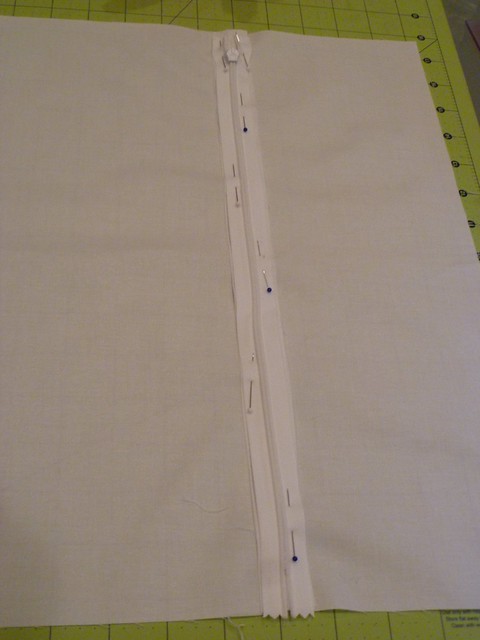
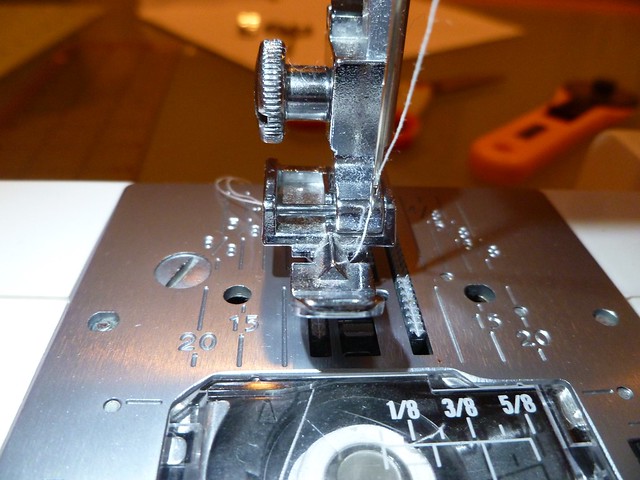
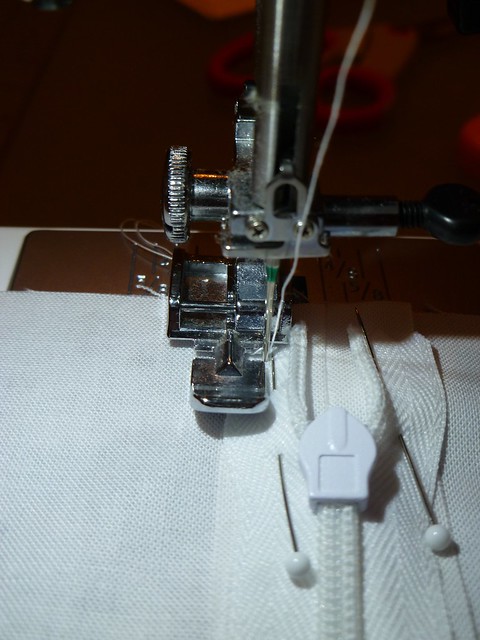
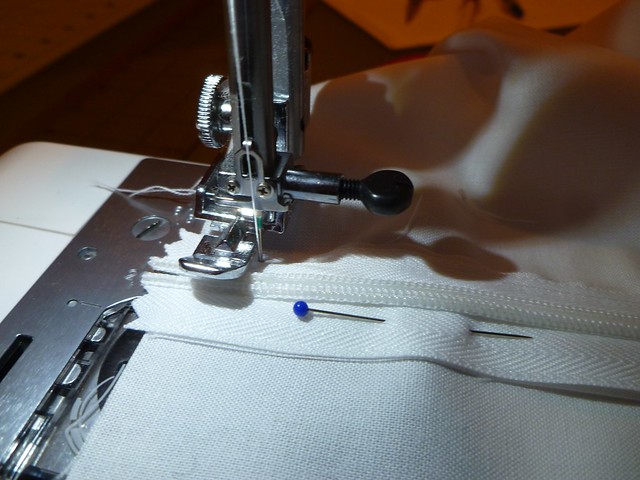
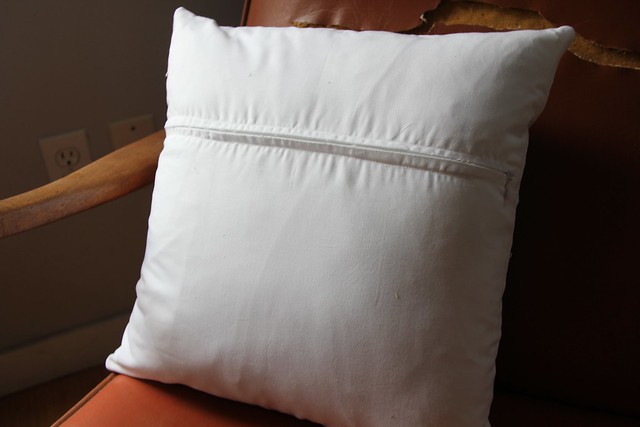
I added a zipper along the side for easy stuffing. And since I was custom making this round floor pillow without a form, and I was shipping her overseas, I couldn't send her stuffed but I thought the zipper would be the perfect way for Charlotte to be able to stuff it herself. I used crumpled pages from a magazine to simulate the stuffing for my photos, so it really won't be that lumpy in reality.

IMG_6797

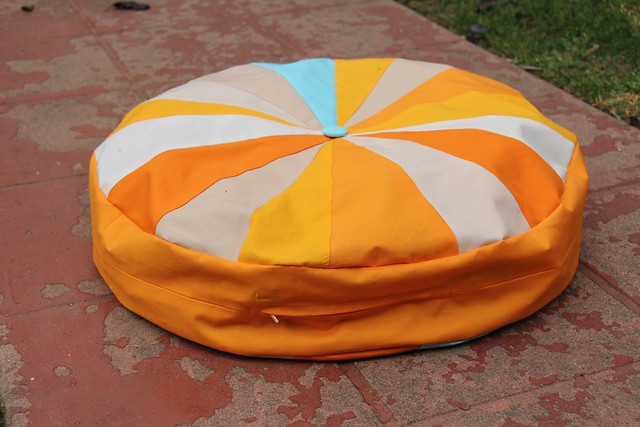
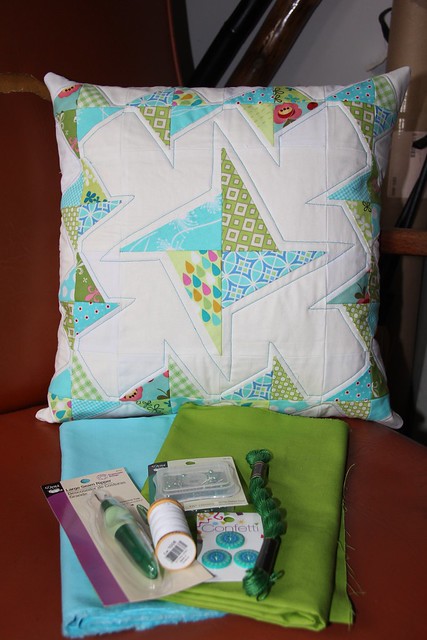
I also tried making my own fabric covered buttons for the very first time and, let me tell you, I am in love! They were so incredibly easy. I see many more of these in my future.

IMG_6800

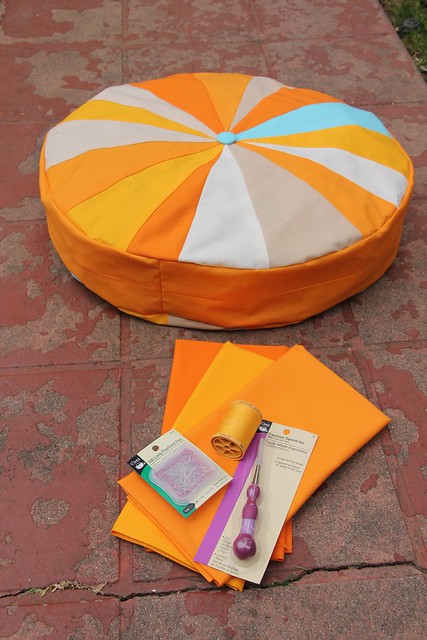
Since I wanted to treat Charlotte as I would any other swap partner, I added some extras to the package including some fabric and sewing tools I hope she could use. Thankfully my package made it safely across the pond to Charlotte. And I discovered later that this was her first swap experience, so I hope that it doesn't sour her thoughts on online swapping. I really had a blasy making this for her. It got me out of my comfort zone and I learned a lot. If you envision it, you can create it. Enjoy Charlotte!

Tuesday, November 15, 2011

Triple 'T' Tuesdays: The Mighty Iron

Welcome back to Triple "T" Tuesdays. Today I'd like to share with you one of my favorite sewing tools. Oh the mighty iron! How I do love thee. I know for many the iron is a polarizing tool. You either love it or you hate it, but either way it is a necessary evil. I am one of those sewers who falls into the first category. I love my iron! Seriously. I know I'm a freak. And just because I love my iron doesn't mean that we don't get into the occasional fight, but the majority of the time I see her as one of the most valuable tools in my arsenal. And I know this makes me a Major Dork, but I squealed with delight when I came home late last night to find that my husband had bought me an amazing gift yesterday...

IMG_6821

Unfortunately my old Black and Decker was on it's last legs. She was constantly clogging up and wouldn't always steam properly, despite my thorough cleanings. And She recently got dropped (more than once) and was starting to come a part at the seams.

IMG_6813

IMG_6816

She was a trusty old girl. A gift from my sister one holiday season years ago. And I am sad to put her out to pasture but it was time for an upgrade. But just look at my upgrade! I can't wait to put that precision tip and power burst of steam to the test! I am giddy like a little girl!

IMG_6818

My love affaire with the iron likely started as a teenager. I used to pick up odd jobs around the neighborhood to try and make some cash and one of my clients used to have me iron her husband's shirts. She hated doing it. I didn't mind and I needed the money. Ironing was never one of the chores that bothered me. Perhaps it's because I first learned to iron as a function of garment construction and not as a daily chore like most people.

IMG_6820

Now that I have added quilting to my crafting resume I think I have developed an even deeper love of this powerful tool. I have my ironing board and iron up, out and at the ready always. And my iron is just an arms distance from my sewing machine so all I need to do it turn around and it's there. An iron will help you achieve a more precise seam. It can help you make that wonky Dresden lie flat. And it can ease even the most wrinkly fabric back into submission.

IMG_6819

For all sewers, and especially quilters, an iron is a necessary tool. Respect her and she will do you wonders. Remember to clean your iron regularly and don't leave water in the reservoir while in storage or the water could leak. After a few days with this pretty little lady I'll let you know how she's working out because I know there are a lot of choices out there.

IMG_6823

Do you have a great Tip, Tool or Technique that you'd like to share? Email me and I'll set you up to do a guest post on an upcoming edition of Triple "T" Tuesdays.

Monday, November 14, 2011

Habitat Challenge Reveal

Last week we had our monthly LAMQG meeting and I was finally able to make it. The past couple months I've been absent because of work, but my friend Jay McCarroll was calling in via Skype on this one and I didn't want to miss it. It was also the chance for us all to reveal our finishes in the Habitat Challenge. This one tested my boundaries. I love Jay's Habitat line but using several of his prints all at the same time was a stretch for me creatively. I thought a lot about what I wanted to make for this challenge a lot before I dove into the project. Our guild had very simple ruled for this challenge:

1) We have to make something quilted, since we are a quilting guild.
2) We can add as many fabrics from the Habitat line as we like but the only other fabrics we're allowed to add are solids.

IMG_6790

I decided that I wanted to make a pillow for the challenge for a couple of reasons. The main one being my schedule has been so out of control lately I didn't think that I would have the time to make a quilt and a pillow seemed the perfect thing. I focused on the fabrics a lot before I started cutting. I wanted to let the fabrics speak to me since they're very bold and have a definite voice. Honestly they're very much like their creator, Jay. Those are two of the things I admire very much about him. He's so super talented and honest and hes' not afraid to speak his mind.

IMG_6733

I started thinking about curves as I looked at the fabric. And while I did do a little sketching, this was mostly improv pieced and I didn't know what the end result would look like when I started. It was a bit like jumping off the deep end. It wasn't until I started quilting that I allowed myself this kind of freedom with sewing. Usually I use patterns when I construct garments. Quilting has really pushed me to grow as a sewer. Even now I approach patterns in a different way and I'm not so handcuffed any more.

IMG_6734

I didn't intend the piece to turn out as literal as it did. I started by using crisp, straight lines on the bottom and then the top was all curved piecing because I wanted it to have a different flow.

IMG_6735

I did straight line quilting using Gutterman variegated yellow 100% cotton thread. I wanted it to feel like a starburst. Then I machine appliqued the circle over the top of the quilting. This wasn't to hide my points - actually they were almost perfect - instead it was deliberate and I wanted to break up the quilting with some "negative quilting" for lack of a better word.

IMG_6794

I used Kona Ash on the back and laid in a zipper enclosure. At first I wasn't so sure about the finished product and all of the prints playing off each other the way they do. I even sent pictures to Natalie to get her feedback because I value her aesthetic and I wanted to make sure it wasn't ugly. It worked for me but it's definitely busy. In the end she convinced me to go with my gut.

IMG_6792

It was definitely nerve-wracking to show it off to our entire guild and to Jay. There were so many absolutely amazing projects made by the incredibly talented members of our guild. But even more fear inducing was having Jay call me out in the middle of the meeting to chat with him while the votes were being tallied. Don't get me wrong, it was wonderful to talk to him. It had been way too long since we last caught up properly and even longer since I've seen him, but it put a spotlight on me that I'm not used to. But it was so good too. I miss him to pieces. He's such an amazing guy! If you get a chance to work with some Habitat you really should! I am actually adding a little more to my stash. I think I see a Habitat dress in my near future.

Friday, November 11, 2011

Catching Up on Bee Blocks

You can tell that it's been another crazy week for me around here because I haven't been able to post anything. Despite that I have been stealing moments here and there to sew. Recently, I sent out bee blocks for October. In the Hope Circle of the do. Good Stitches Bee Kat asked us to make Bento Box Blocks using greens, blues, browns and blacks. My first attempt at my Blue Block proves that you shouldn't sew to try to cure insomnia.


At least I caught my mistake early and was able to rectify it quickly.


Then, in the Sewn Together Bee, Amber sent us all some fabulous black, white, blue and green fabrics for us to create so string blocks for her. I'm sensing a trend with this color palate right now.

IMG_6807

IMG_6806
IMG_6805

And finally, I sent my dear friend Danielle some PJs for her daughter Hadley. Danielle is among my group of friends who didn't know of my "undercover" sewing obsession until I went public with it recently. She saw the PJs I made for Arden when I posted them on Facebook and immediately asked for some for her youngest in purple. I was more than happy to oblige.

Untitled

So, despite my silence I have been doing some stitching. And I'm hoping things will return to normal again around her next week.

Thursday, November 3, 2011

Little Stitches Week 9 - Pattern C - Bed Skirt

It's Week 9 of the "Little Stitches" Sew-Along. Okay, so I know that I promised to show you the Comfy Jumper Dress this week, but it's been a busy week for me and I'm not quilt finished with it yet. So I hope you don't mind me showing another finish instead.

Pattern C - Modern Crib Set Bed Skirt - Difficulty Level: 3

IMG_5580

Another one for Arden. I'm keeping her well dressed and in style! Ehren and Caroline had a forest theme in mind for her and Caroline helped me find this adorable fabric that almost perfectly matches her bedding.

IMG_5599

This one came together so quickly and easily. Really, I had no complaints or mistakes on this one. Even the side panel "pleats" were easy.

IMG_5609

I think this pattern is labeled level 3 because of some of the other patterns in the set, but definitely not for the crib skirt. The hardest thing here is just free cutting the fabrics using only measurements and not pattern pieces. And that's not really all that "hard" it just involves math and a ruler.

IMG_5610

This was so easy to whip up in no time at all and conforms to standard crib sizes.

IMG_5611

So what are you working on? Link up your latest projects here and show everyone what you're making. You can share your projects in any state from start to finish. Remember, you can also show off your "Little Stitches" Sew-Along projects anytime in the Undercover Crafter Sew-Along Group on Flickr. See you next week when I really will show you Pattern E: The Comfy Jumper Dress.


Wednesday, November 2, 2011

PTS6 Sent!

IMG_6764

My package for Round 6 of the Pillow Talk Swap is out in the mail traveling to it's new home. The pillow isn't exactly my style, but I think I gave my partner everything she asked for - at least I hope I did. I do love the color scheme of the white with lime and aqua. Those colors always work in my book.

IMG_6761

Unfortunately after it was finished, I realized that I must have had some Kona Snow lying around with my Kona White because in the sunlight I noticed a couple squares off just a shade. Ugh. And it was too late to start over. I am sorry partner! Hope it's not too noticeable!

IMG_6763

I added a zipper enclosure on the back and kept the back plain and simple white as I thought it would match my partner's desired color scheme. And, as always, I included some extras to round out the package... some lime and aqua Kona cotton, thread, pins, a seam ripper, some Pearle cotton embroidery thread and some cute buttons.

IMG_6757

I really hope I was able to predict my partner's style and I hope she likes everything. As for me, I am waiting, anxiously, for my pillow to arrive. Which one will it be? I'm in love with so many of the creations I've seen in the Flickr group.

P1040204

And I hope everyone had a wonderful Halloween! It's one of my favorite holidays and this year we celebrated in Phoenix for a friend's 40th Birthday. For anyone who hasn't seen the new series "American Horror Story" on FX you should set your DVR! It's our new favorite show. It's so creepy! And my costume will make a lot more sense.

Tuesday, November 1, 2011

Easy Zipper Tutorial

Welcome to Triple "T" Tuesdays. Today I wanted to share with you a simple technique for adding a zipper to your projects.

I hear from a lot of quilters that zippers are intimidating. But I don't think they should be. I started as a garment sewer so zippers are second nature to me, but they don't have to invoke fear in the hearts you quilters out there. Last night, I was putting the finishing touches on a couple pillows and I decided that I wanted to add zipper closures to both, since they add a more fitted quality to your pillows. And I decided I would create my first tutorial in the process.

Step 1: Since this was for a pillow backing I cut the fabric where I wanted the zipper closure, so I had two pieces of fabric of the same width.

P1040222

Step 2: Place your two pieces of fabric, right sides together, matching up the edge where you want to insert the zipper. Using a zipper slightly shorter than your fabrics, center it and note where the head of the zipper begins and zipper ends. I'm not talking about the fabric head and tail on the zipper but the actual zipper itself. Mark these points on your fabric using straight pins.

P1040223

Step 3: Starting at one end of the fabric, sew a 1/2" seam (backstitching at each end) to the first pin. Do not cut your thread. Instead keep your machine in the needle down position, and adjust your stitch length all the way to the longest stitch legnth and continue to a 1/2" seam using the basting stitch all the way to the other pin. Once you reach the other pin, drop your needle again and revert your stitch length back to normal to finish out your 1/2" seam (backstitching at each end). **I know most quilters are used to working with 1/4" seams but it's very important to create a 1/2" seam when inserting a zipper for security. If your seam is too narrow you risk not stitching your zipper into your seam properly AND the zipper might not hold up as well over time with all the stress put on this seam.**

Step 4: Press your seam open. It's important to press your seam open and not to the side because this is where you are going to attach each side of the zipper.

P1040227

Step 5: With your fabric Right Side Down, place the head of your zipper at the point you marked in Step 2. Your zipper should be Right Side Down against the Wrong Side of the fabric. Pin the head of the zipper in place, taking care to ensure that the zipper sides are over the fold in your seam.

P1040229

Step 6: Carefully align the center of your zipper flush with the center of your seam, pinning occasionally as you go.

P1040232

P1040233

Step 7: Attach your machine's Zipper Foot.

P1040235

Step 8: Starting at one end, backstitch to secure then stitch all the way down one side of your zipper. I use the middle of my zipper foot as a guideline. Take care as you stitch around the zipper head, this is where most stitching errors occur. Make sure you have enough room to get your foot around the head of the zipper, but you are still stitching all the way through the zipper fabric and your seam.

P1040236

Step 9: Stop stitching just below the metal tail of your zipper. Drop your needle and pivot, making a 90 degree turn. Continue stitching to the other side of the zipper. Again, drop your needle and pivot another 90 degrees, then continue your stitching all the way back up the other side of your zipper. Backstitch at the other end.

P1040237

Step 10: Using your seam ripper, carefully cut your basting stitches. Don't rush. It's easy to clip more than just the basting stitches, or even worse, rip through your zipper or fabric if you're not paying attention.

P1040241

Step 11: Pick out your loose threads and you're done. It's that easy! You're ready to take your zipper for a test drive.

IMG_6762

Hope this helps! Do you have a great Tip, Tool or Technique that you'd like to share? Email me and I'll set you up to do a guest post on an upcoming edition of Triple "T" Tuesdays.